About this 3D model
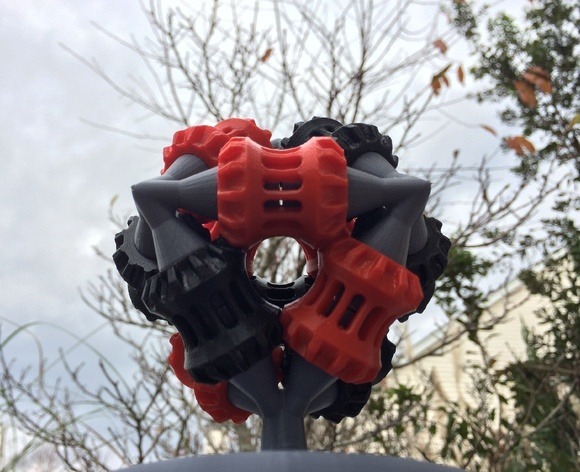
This is a brain gear. Rotate one gear and they all spin. https://www.youtube.com/watch?v=0SV_UyZj2rA Print Settings Printer Brand: BambuLab Printer: X1C, P1P Rafts: Doesn't Matter Supports: No Resolution: .24 Infill: 20% How I Designed This This was designed using an existing Brain Gear and a modified gear. It was designed to be printed without support, using 45 degree angles. Instructions Print 12 P-Brain Gears Print 5 Brain Gear links Print 1 Brain Gear Link to base Print 1 base Assemble carefully using epoxy to bond links Rotate and be amazed. :) Custom Section Project: P-Brain Brain Gear Overview & Background: This project will provide the opportunity to execute and learn basic printing techniques while printing a tangible object to interact with. Objectives: To learn plating. The 45 degree rule. Layer height and lamination. Part removal from build plate. Post printing assembly and finishing. Intro to gears. Audiences: 10 and up. Subjects: Math. Science. Math Art. Scientific Art. Mechanical Engineering. STEM. STEAM Skills Learned (Standards): Plating. The 45 degree rule. Layer height and lamination. Part removal from build plate. Post printing assembly and finishing. Intro to gears. Lesson/Activity: @200micron 1. Print 12 P-Brain Gears 2. Print 5 Brain Gear links 3. Print 1 Brain Gear Link to base 4. Print 1 base 5. Assemble carefully using epoxy to bond links 6. Rotate and be amazed. :) Duration: 3 Days Preparation: You will need: 1 3D printer. 2 part Epoxy (JB-Weld works well). You must start the project by ordering the color/s of filament you wish to use to print with. It is recommended that you use multiple colors for the gears to highlight them spinning. References: More information can be found for further study @ http://reprap.org/wiki/BrainGear Custom Section Rubric & Assessment: A basic understanding of how a 3D printer can assist in Mechanical Engineering. Handouts & Assets: Class 3D printer and filament and curious kids. Category: Mechanical Toys