About this 3D model
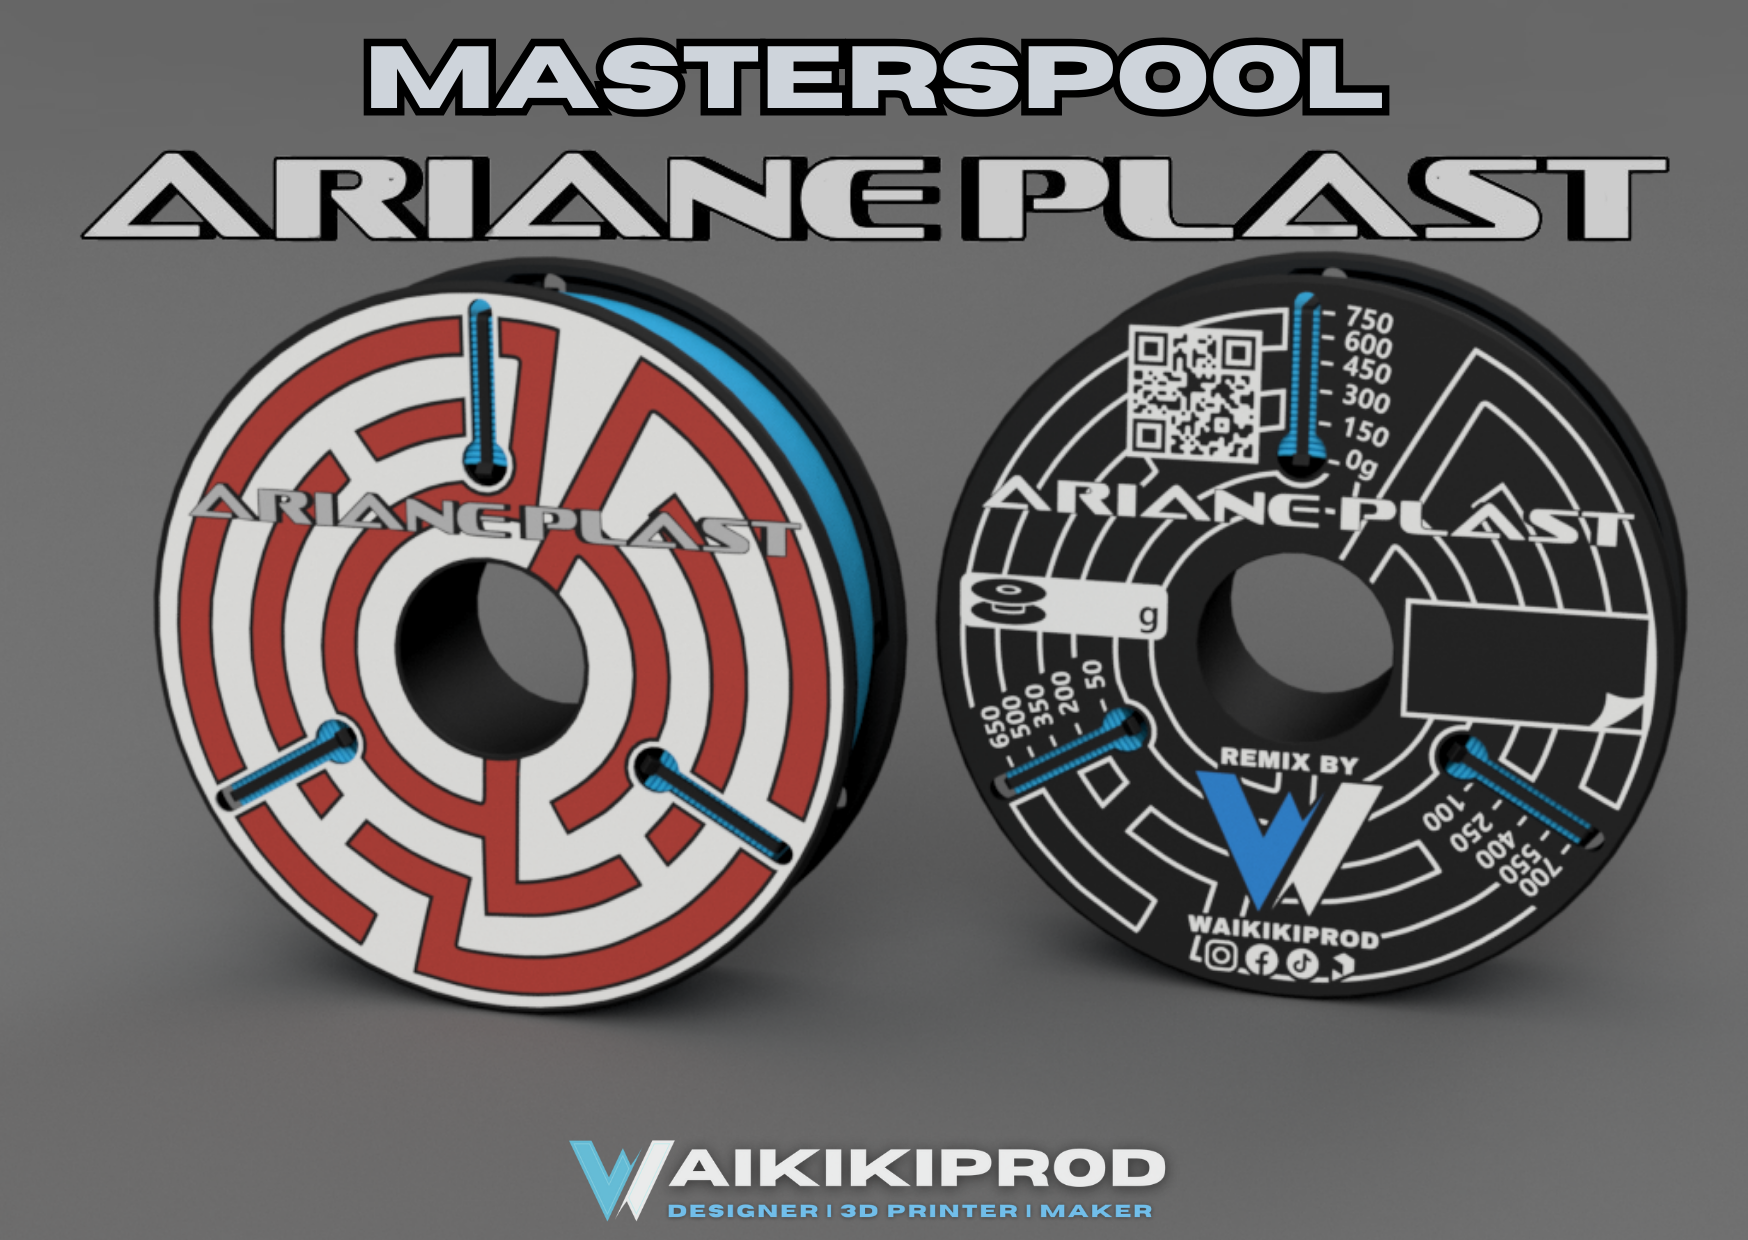
History : 11/08/2023 - Publication of the first version V1.2 Table of Contents : Introduction Features and compatibility of my remix Printing the MasterSpool spool Installing the MasterSpool in its spool Usage Credits and acknowledgements 1. Introduction Side B : Different designs Classic Cocorico Edition A color Side A : This model is an in-depth optimization and remix of the MASTERPOOL spool by Richard HORNE standard version (V4) dedicated to Masterspool by the French brand Arianeplast I improved it to have a Masterspool spool : with a better filament retention system for storage more adapted to current uses that encourages a more environmentally responsible consumption of raw materials more aesthetic Give a gift to one of my favorite filament brands → Arianeplast 2. Features and compatibility of my remix Part A Optimization of the base of the filament end reception (Too short in the original version) Part B Space for the choke collar heads before cutting them. Improvement of the filament block after use I took the original shape but reversed its direction. It is now hidden inside the spool and less bulky than the original system MasterSpool compatibility Filament compatibility Filament 1.75 mm Ok all brands Filament 2.85 mm ? (waiting for your feedback) all brands Spool Holder Compatibility original support type Ender 3 and other brands Ok spool holder type bearings Ok (very effective on my Atlas spool holder ) AMS Bambu Lab Ok 3. Printing the MasterSpool spool Recommended settings Filament type : Recycled PETG or PLA (less durable over time) Layer height : First layer at 0.2mm Other layers at 0.2mm Perimeters : Minimum 2 with a 0.4mm nozzle Infill : Grid or Triangle pattern at 15% minimum Speeds : First layer at 30mm/s (Best aesthetics) Other layers at normal speeds In the multi-color version, the printing of logos, patterns and other illustrations is done on the first two layers, each at a layer height of 0.2mm. Note: it is possible to print the multi-color spool with a single-color 3D printer if you chain the prints one after the other and by imposing a Z jump of at least 0.40mm during the movements (retraction tab) in your slicer 4. Installing the MasterSpool in its spool step 1 : Weigh your empty spool and mark its weight with a marker in the area provided for this purpose step 2 : Insert the MasterSpool onto PartA taking care to orient the choke collar heads towards it so as not to obstruct the future assembly of PartB. When positioning the MasterSpool, slide the end of the spool into one of the three holes provided for this purpose (see below). step 3 : Align and tighten PartB until you get a good tightening and align the choke collars in the grooves. step 4 : Cut the choke collars with pliers and you should be able to remove them completely from the spool. You can then block the wire in the holes on the outside of the spool to hold the filament step 5 : Glue the label provided with the MasterSpool onto PartA in the dedicated area There you go, you've assembled your Masterspool! :) 5. Usage Two methods to estimate the amount of filament remaining Method 1 : weighing the whole thing (the most accurate) Method 2 : visual measurement on the spool gauges (results may vary depending on the tension in your filament winding) Weigh the spool and subtract the empty weight of your spool from this measurement Visually estimate the amount of filament remaining using the 3 gauges Store your MasterSpool Once the filament is removed from the extruder. slide the filament into one of the grooves (6 available, 3 on each side) placed at the ends Change the MasterSpool It is possible to change a MastersPool even if it is not finished. Simply put the choke collars back in place through the 3 open areas before disassembling the spool. Credits and acknowledgements Website / Facebook I thank Arianeplast for allowing me to use the image of their brand to offer you this design. Aianeplast therefore has exclusive rights to use this model for commercial purposes. Thanks to Richard Horne for creating the base that I was able to remix. Follow me on Instagram / TikTok / Facebook / Beacons Discover My Best 3D Models X1C Keychain Axe Magnet Tank toy - Print in place Foaming Soap Dish The console of your childhood The Ultimate Fidget Avocado Keychain