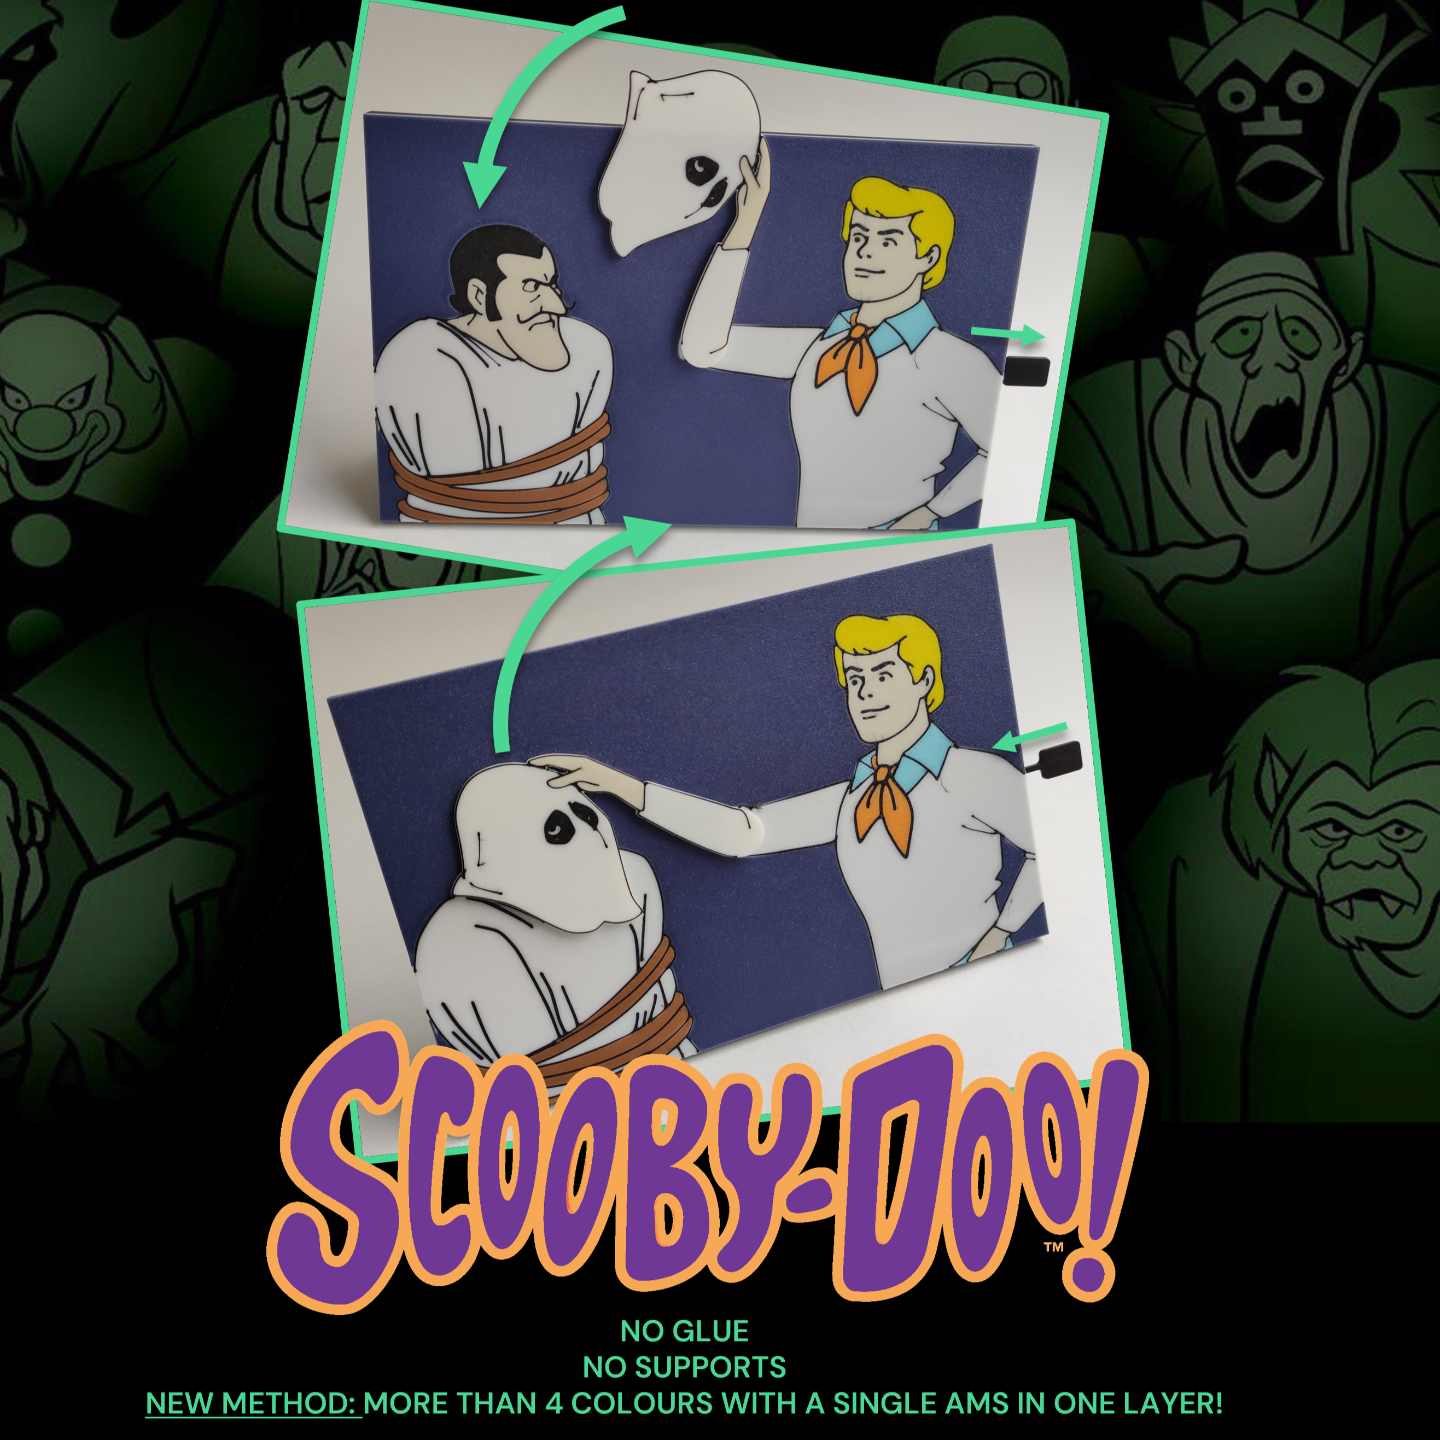
About this 3D model
This is a simple actuator/automata display model of the Scooby Doo mask reveal meme . I like the meme template and wanted to turn it into a fun 3D printable model to have on my desk, especially at spooky halloween time. The print features a rack and pinion gear machanism which translates linear motion into circular motion. By pushing the rack, Fred's arm will reveal the villain by unmasking him in a smooth swoop. The assembly requires NO glue and NO externaly sourced parts , everything is 3D printed. The model is modular so you can design your own frontplate which utilizes the same mechanism and just exchange it (a blank FRONTPLATE is availlable in the files). All parts can be printed in approx. 3 - 3.5 h with BBL P1S with a 0.4 mm nozzle . The mechanism parts ( BASE , GEAR and RACK ) are designed for easy printing without suppports and print collectively in approx 1.5 h (P1S). The model somewhat relies on tight tolerances in order to be assembled. The most "important" tolerance is between the gear and the moving arm so they can be friction fit together but still can be disassembled later. Since the tolerances vary strongly between printers, printer models, settings and filament, I have provided multiple gear models with different tolerances on Plate 02 to be printed separately, from which you can choose which one fits best (15 min for 4 gears on P1S with 0.4 mm nozzle). The gears are quite small and do not consume much filament, and in my builds GEAR_3 worked best. ------------------------------------------------------------------------------------- The FRONTPLATE features 8 colours printed in one layer which required a little bit of slicer trickery for printing with only one or no AMS. PLEASE READ THE PRINT INSTRUCTIONS CAREFULLY ON HOW TO PRINT THE FRONTPLATE DEPENDING ON YOUR PRINTER SETUP! If you have two AMS units (you lucky person) then the print is simple and straight forward (see 2xAMS print profile and the corresponding print instruction). If you have “only” one AMS , then you are limited to 4 colours/layer and you would need to print the FRONTPLATE from two plates. Please refer to the print instructions for printing with one AMS ( 1xAMS ) and read it carefully before printing! I added a small piece of the frontplate to test if the method works for you ( 1xAMS_TEST ). If you are uncertain please try to print this first :) I am also working on using the same method without needing an AMS at all but unfortunately it is not 100% straigt forward as in this presented solution. As soon as I have it ready I will post it here :) ----------------------------------------------------------------------------------- The assembly is mostly intuitive but I have included a comprehensive assembly instruction as a PDF as well as a short video below :) I am looking forward to your makes and your feedback! Happy printing and HAPPY HALLOWEEN! Printed and tested on BBL P1S with one AMS. 0.4 mm stainless steel nozzle, Textured PEI build plate. Print settings: BASE: 0.2 mm layer height, 3 walls, 10% hexagonal infill, 0.8 mm bottom layers, no top layers, arachne STANDS: 0.2 mm layer height, 3 walls, 10% gyroid infill, 3 bottom layers, 3 top layers, arachne GEAR and RACK: 0.2 mm layer height, 4 walls, 100% infill, 3 bottom layers, 3 top layers, arachne, (top surface ironing for RACK) ARM and all colours for the FRONTPLATE: 0.2 mm layer height, 3 walls, 100% infill, 3 bottom layers, 3 top layers, arachne Used filaments for the print in the pictures: BACKGROUND: eSUN PLA+ navy blue COLLAR and JEANS: GEEETECH PLA blue SCARF: BambuLab PLA Basic Orange HAIR: eSUN PLA+ yellow SKIN: eSUN PLA+ bone white OUTLINE: eSUN PLA+ black ROPE: eSUN PLA+ dark brown CLOTH and FRONTPLATE: eSUN PLA+ white BASE, GEAR, RACK, STANDS: eSUN PLA+ black ------------------------------------------------------------------------------------------------------ Here is a quick Q&A with potential questions: Q: Why is the printing of the FRONTPLATE with one AMS or no AMS so complicated? A: If you want to print more than 4 colours with only one AMS (or no AMS at all) you usually can introduce a GCODE command for pausing the print and changing the filament. However, as far as know in Bambu Studio this command can only be easily implemented between layers and not inside a single layer . The model was designed to print all 8 colours on the first layer only (@ 0.2 mm) to minimize filament consumption (since you don’t need the same colour stacking on top of itself) as well as unnecessary filament switching. Therefore, you need to do such a trick to allow more colours to be printed inside one layer. Q: My TEST print looks bad. The colours from the second plate have gaps and do not look smooth. A: This has to do with the nozzle height. I had the same issue even after taking care of the previous point, so I ran the built-in calibration of the machine again and after that it worked on the first try. Another issue could be that despite deactivating bed leveling, the sta