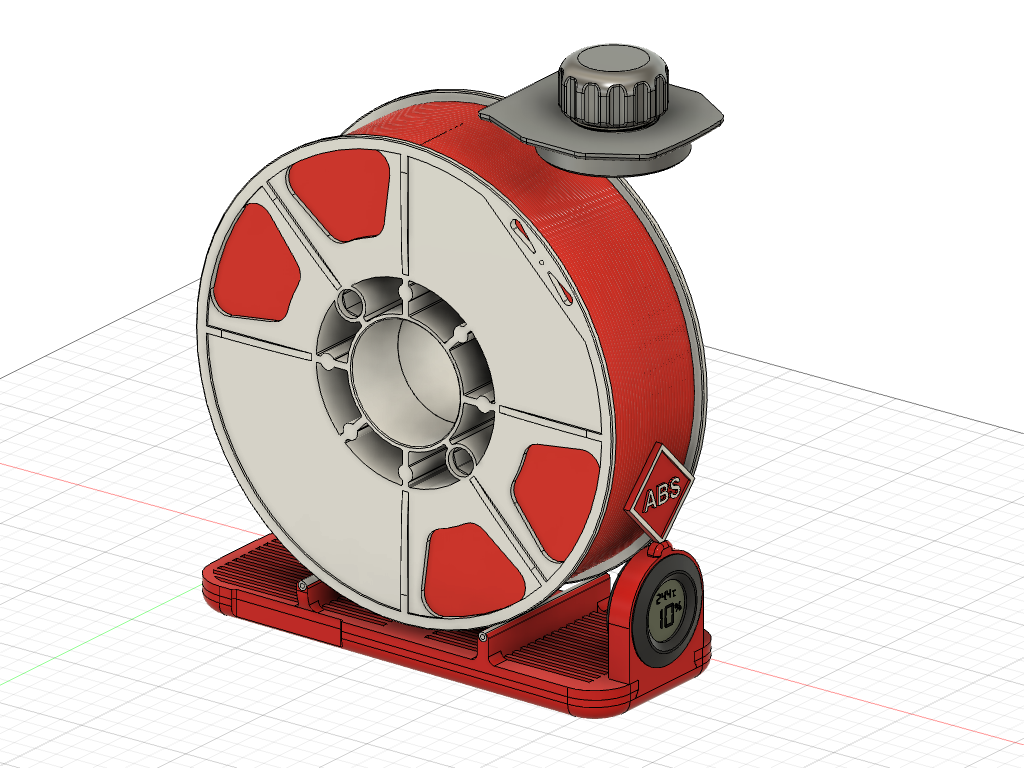
About this 3D model
Updates: 24.04.27 - Added PLA CF and PLA Tran as per user request 23.12.05 - Added new rectangular filament box for rectangular containers. Please see the Additional Parts section items 1b for link to box. The print has not ben tested yet, looking for feedback. 23.12.05 - Re-toleranced the lid threads for easier printing, tested, and uploaded. All non-tpu lid parts can now be printed on one plate 23.10.15 - I re-uploaded the covers and tray because I forgot to clearance them when I re-did them. 23.11.06 - Added a hygrometer frame for round hygrometers with vertical mounting tabs. Introduction Ever since I entered the hobby in 2016, I've struggled to find a filament storage system to fit my needs. Like most people, I used large air tight tubs to store multiple rolls but they have serious shortcomings: Opening a box repeatedly to access a roll lets in a fairly large volume of air that had to be dried out again, which rapidly saturates desiccant. It was impossible to read the filament type on the labels of rolls packed shoulder to shoulder. Using dedicated boxes for each filament type took even more room becasue many were not optimally packed. I would literally end up with 1 large box for a single roll. Even when full of rolls, there was a lot of unusable space which added to their already considerable bulk. Full boxes were heavy making stacking and unstacking a real chore when looking for a roll or trying to remeber what I had. There was no elegant way to store the boxes. The ever present pile of ugly boxes awere always in the way and a blight in my shop. Mutli filament dry box storage and feed systems are especially useless when you have an AMS. Fun fact: My current Ikea book shelf will fit up to 84 rolls of filament. 56 face forward as seen in the picture and another 4 behind them. I usally put repeat colours or unopened boxes behinfd the front ones but I suggest reinforcing the shelf using a piece of wood screwed to accross the bottom of the shelf. Fun story: everytime I showed the new system to freinds, they would pull out their huge boxes with a very proud and superior attitude as if they were educating me. They were also the first converts. Design Goals My original design goals was to design an affordable single roll storage system that fit rolls tightly and was as hardware free as possible. As usual, scope creep set in and the design expanded to include: A component to support round hygrometers which I think look better but also fit neatly between the dry box mold lines, making them easy to read. They are also ridiculously cheap in bulk. Eliminate the need for screws and avoid having to drill holes to make it accessible to more makers. A simple, inexpensive and reliable roller system that used minimal hardware to reduce complexity and print time. A replacement lid that integrates a bowden PTC fitting to feed the filament. A filament hook to secure the filament without opening the box after use. A cap to seal the box when not in use. My favorite part was developing an easy to use filament identification system. Each filament class has it's own shape that is modified for variants. Ex: The PLA tag is a square while all PLA derivatives are square with rounded corners. Color changes are at the layer level meaning anyone can enjoy 2 color tags. The Parts Before you start we need to discuss tolerances. This project has some tight tolerances in relation to each other. They should work fine if you follow a few rules: Print the parts on the same printer Use the same filament Print the tray cover and tray in the same direction If anyone has issue with the tolerances please let me know in the comments. There are 2 covers to choose from, standard or roller. I am exclusively printing the roller because even if I don't intend to box feed, it holds the reels nicely. Cover (Standard or roller) Silica tray Hygrometer frame Filament Tag, Please note that I didn't want to re-do my normals in Fusion 360 so they are all facing backwards. Use the 3D viewer to see them in full. If you need a filament tag that I haven't included, please let me know in the comments. Optional Parts If you want to box feed will also need: Lid PTC fitting (Bowden coupler) mount Gasket (TPU) Cap Printing In order for the threads to work properly , print all the lid components at .12. All other parts can be printed at .2 layer height and Bambu sport mode speed. Print the gasket with TPU, beveled side up, on a non textured plate to get a smooth interface surface that will ensure a good seal. If printing multi color without an AMS or similar, create a plate of the filament tags you want and paint the top 1 mm with your contrast color of choice. Add a pause at the color layer and swap the filament manually Assembly If you opted for the roller cover, insert bowden tubing into the front and trim. Repeat for rear. Use the measuring cup included with the containers to measure out 50ml of beads and gently pour them into the dessicant tray from the side of t