About this 3D model
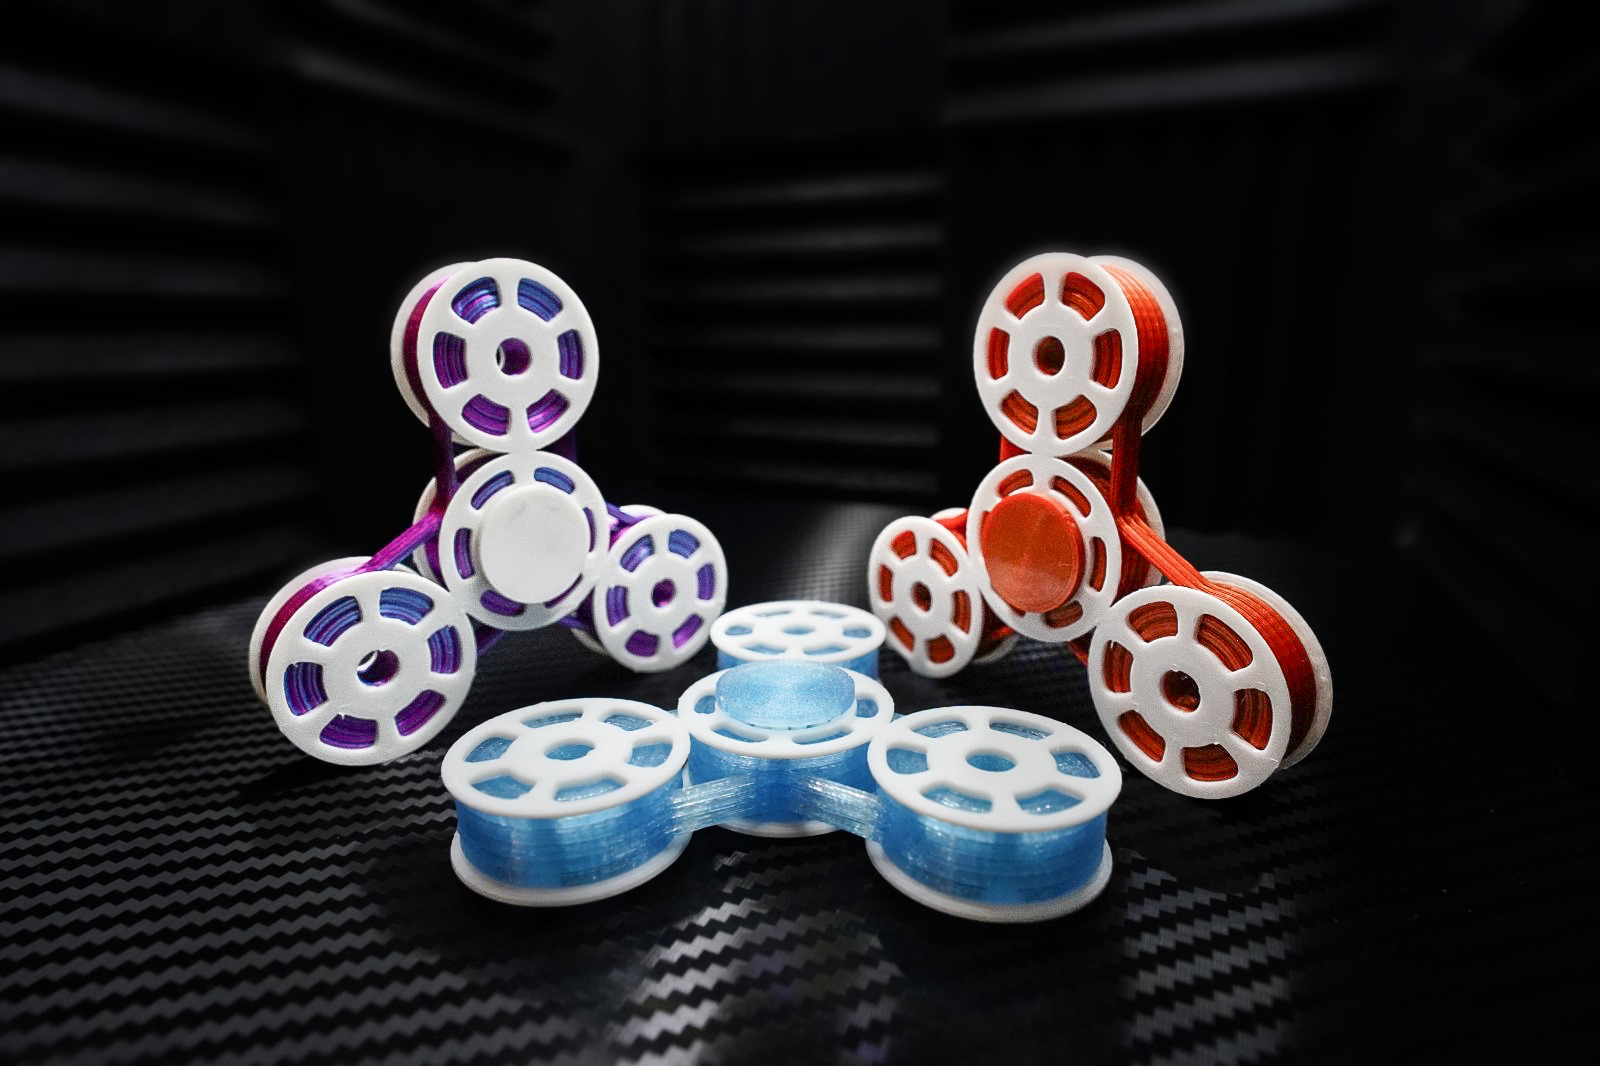
Auf Deutsch? einfach etwas weiter runter scrollen Hello MakerWorld Community, After much consideration on how the next Fidget Spinner should be designed, we have developed the Fillaspinner. The Fillaspinner is based on the design of filament, which you need to print the spinner ?. It looks exactly like filament, except that it is connected with plastic yarn made from filament. The spinning capability is amazing, as we have incorporated a nail bearing instead of a metal ball bearing to enhance the spinning performance. For assembly, we have created a helpful video to guide you through the process. However, I can confidently say that assembly is very simple and consists of only 5 easy steps. Everything is designed to be printed on-site, and you do not need any additional components for the Fillaspinner. Furthermore, we have also developed another version of the Fillaspinner with simple slide bearings that can also be printed on-site. You only need a few anchor points to attach the spinner, and we have named this version "Best Assembly" in the printing profile. Enjoy your Fillaspinner and experiment with different printing settings, colors, and sizes to customize your spinner. Feel free to share your modifications with the community so that others can benefit from your creativity and create their own unique spinners. If you create a new printing profile, please test it and take pictures of your print. If you upload a profile without an image or use someone else's image without permission, we will remove the printing profile after some time. So, enjoy printing and spinning, and may your Fillaspinning experience bring you joy! Edit: If we receive multiple beautiful FillaSpinner pictures from you, the community, showcasing various colors, we will create a small collage of all the lovely FillaSpinner photographs. Thank you for your support?. building instructions --------- For ,,Best Spin'' --------- Step 1: Remove the scrapper from the print plate and then release the two bearing caps. Step 2: Now, insert the bearing ring into the elongated holes of the FillaSpinner in the center. Step 3: Gently bend your print plate but ensure that the spinner, including the needles and core, doesn't fall down. Step 4: Rotate the print plate so that the FillaSpinner aligns with your grip, with the previously closed side of the FillaSpinner facing outward. Step 5: Insert the second bearing clip into the designated elongated holes. Your FillaSpinner is now ready. Enjoy! Tip: If you notice that some of the needles are caught on the core or the spinner due to stringing, I would recommend removing each individual needle to insert them into the spinner separately for the maximum spinning experience. It will still work if you don't do this check :) --------- For ,,Best assembly'' --------- Step 1: Remove all parts from the print bed and insert the bearing clips into the designated elongated holes. Done! :D _ _____________________________________________________ _ ___ Hallo MakerWorld Community, nach langer Überlegung darüber, wie der nächste Fidget Spinner gestaltet werden soll, haben wir den Fillaspinner entwickelt. Der Fillaspinner basiert auf dem Design von Filament, das du benötigst, um den Spinner zu drucken ?. Er sieht genau wie Filament aus, nur dass er mit einem aus Filament bestehenden Kunststoffgarn verbunden ist. Die Spin-Fähigkeit ist erstaunlich, da wir anstelle eines Metallkugellagers ein Nagellager eingebaut haben, um die Spin-Fähigkeit zu verbessern. Für die Montage haben wir ein hilfreiches Video erstellt, um dich durch den Prozess zu führen. Ich kann jedoch zuversichtlich sagen, dass die Montage sehr einfach ist und nur aus 5 einfachen Schritten besteht. Alles ist so konzipiert, dass es vor Ort gedruckt wird, und du benötigst keine zusätzlichen Komponenten für den Fillaspinner. Darüber hinaus haben wir auch eine andere Version des Fillaspinners mit einfachen Gleitlagern entwickelt, die ebenfalls vor Ort gedruckt werden können. Du benötigst nur einige Haltepunkte, um den Spinner anzubringen, und diese Version haben wir im Druckprofil "Beste Montage" genannt. Viel Spaß mit deinem Fillaspinner und experimentiere mit verschiedenen Druckeinstellungen, Farben und Größen, um deinen Spinner anzupassen. Teile gerne deine Modifikationen mit der Community, damit andere von deiner Kreativität profitieren können und ihre eigenen einzigartigen Spinner erstellen können. Wenn du ein neues Druckprofil erstellst, teste es bitte und mache Bilder von deinem Druck. Wenn du ein Profil ohne Bild hochlädst oder das Bild einer anderen Person ohne Erlaubnis verwendest, werden wir das Druckprofil nach einiger Zeit entfernen. Also genieße das Drucken und Spinnen und möge deine Fillaspinning-Erfahrung Freude bereiten! Edit: Wenn wir mehrere schöne Fotos von FillasSpinner von euch, der Community, in verschiedenen Farben erhalten, werden wir eine kleine Collage aus all den schönen FillaSpinner-Fotos erstellen. Vielen Dank für eure Unterstützung?. B