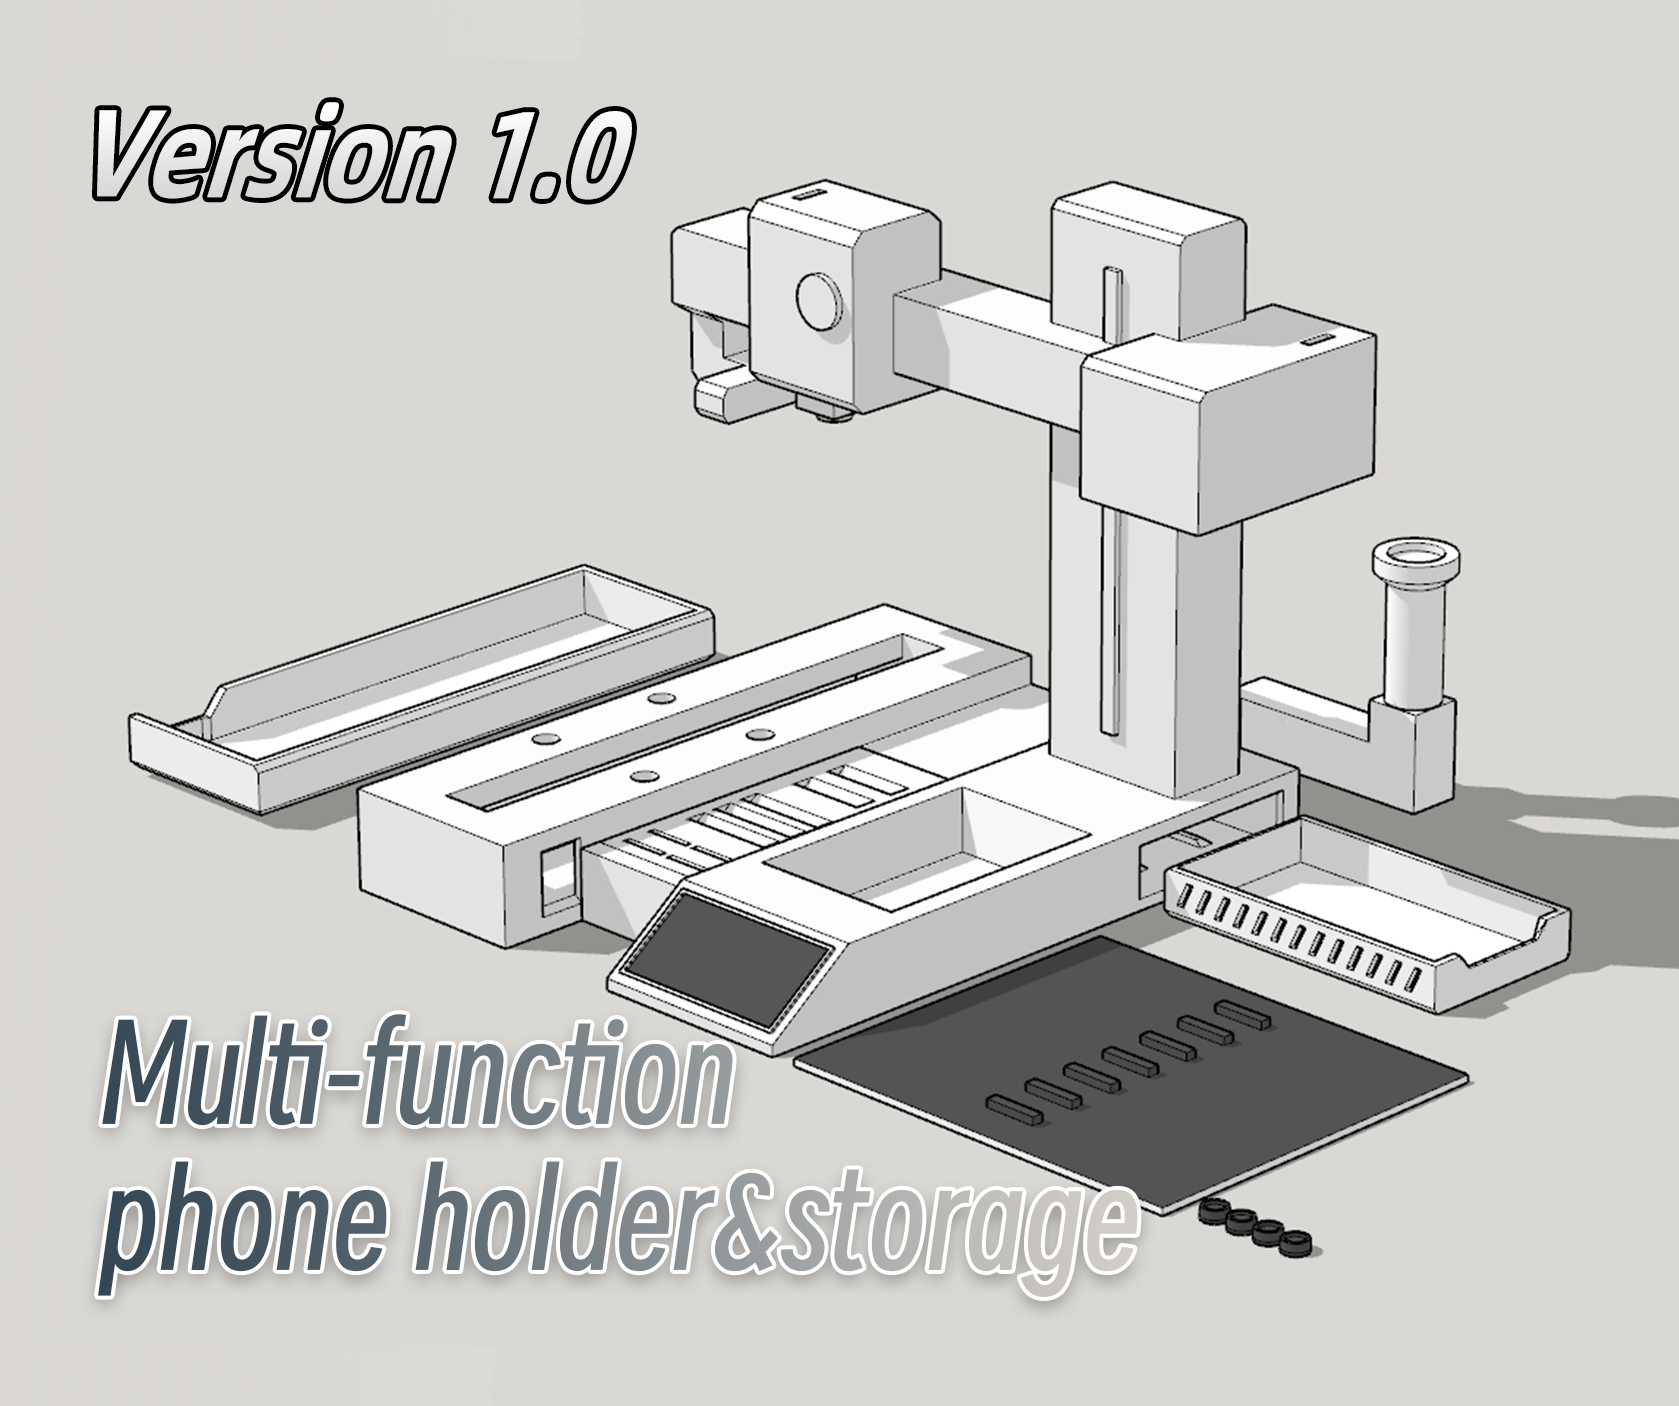
About this 3D model
【VEDIO视频】: https://www.bilibili.com/video/BV1NC4y1M7nf/?share_source=copy_web&vd_source=c514f8da03404c5b755a9948af79b587 【特点介绍Description】 Hello you guys, I'm Yoturn, this work is a lovely model of a1 mini, I added a cell phone holder and storage function to it. Here are some features ( The document list includes a guide in pure English, which I translated for you using translation software. Download the PDF at the bottom of the webpage. ) 适合所有3D打印爱好者的桌面装饰,实用的收纳组件、手机支架 Desktop decoration for all 3D printing enthusiasts, practical storage components, cell phone holder 双面平台:一面可以提供稳固的手机架功能,另一面可以实现滑动,模仿A1 mini的可动热床 Dual-sided platform: one side can provide a solid cell phone holder function, and the other side can realize sliding, mimicking the movable hot bed of A1 mini 可存放TF+SD+CFA卡,拥有2个USBC和1个USB固定槽(但没电) Can store TF+SD+CFA cards, with 2 USBC and 1 USB fixing slots (but no power?) 为A1 mini的180平台设计,也适合所有更大尺寸的3D打印机 Designed for the 180 platform of the A1 mini, it also fits all larger 3D printers 仅需2板即可打印所有,主体一体成型,一板搞定,共需要280g材料(支撑仅占28g) Only 2 plates are needed to print all, the main body is molded in one piece, one plate is done, a total of 280g of material is needed (the support only takes up 28g) 多个可选配件 (2个盒子+后挂架+移动平台) Multiple optional accessories (2 boxes + rear bracket + mobile platform) 提供建模软件的源文件(skp)供大家自行二创 Provide source files (skp) for your second creation 多种颜色随心搭配 【打印&安装步骤Print & Installation Steps】 提前准备:建议备好给塑料用的胶水,280g材料(我测试使用的都是petg),最好再来几个橡胶脚贴 Preparation in Advance: It is recommended to have plastic adhesive, 280g of material (I tested using PETG), and a few additional rubber foot pads would be ideal. 1. 下载打开我发布的配置,修改材料页面,匹配你的耗材,然后预览切片没什么报错就可以开始打印了,如果你的板子经常容易不沾,提前涂上pvp固体胶或者使用其他手段加强粘性(其中第一板是收纳架主体,第二板是配件,其中第一板主体的稀疏填充可以修改成自适应立方体,可以省45min打印时间和16g材料,不过网格我测试的最多,配置里用的是网格。当然除了支撑,我觉得都可以改,速度也是为了防止太多的下垂降低了一部分) Download and open the configuration I provided, modify the material settings to match your filament, then preview the slicing. If there are no significant errors, you can proceed to start printing. If your bed tends to have adhesion issues, it's advisable to apply a layer of PVP solid glue or use other methods to enhance adhesion. The first bed serves as the main structure for storage, while the second bed contains accessories. For the sparse infill of the main structure on the first bed, you can adjust it to adaptive cubic, saving 45 minutes of printing time and 16g of material. However, in my tests, the grid pattern is the most efficient; the provided configuration uses a grid. Of course, except for the supports, I believe other settings can be modified, and the speed is adjusted to prevent excessive drooping, reducing some issues. 2. 主体打印完成后(约8小时)拆除支撑,非常好拆,可能有一点点残留,可以扣掉。整个模型的支撑仅28g,可能会有1-2处桥接的地方出现垂丝,剪掉、拔掉都可以 After the main body printing is complete (approximately 8 hours), remove the supports. They come off easily, and there might be a slight residue that can be easily taken off. The entire support structure for the model is only 28g. There might be 1-2 areas with stringing at bridging points; you can trim or pull them off. 3. 打印可选配件约2.5小时(我肯定建议全部打印) Print optional accessories for about 2.5 hours (I strongly recommend printing all of them). 4. 安装可动平台的四个塑料脚垫,可能会因为每个人的材料不完全一样,造成不一样的尺寸差异,我建议使用亚克力胶水将4个脚垫固定到板子的底部(小脚垫有凹槽的一面朝外,凹槽仅是区分正反面的作用)干了后再使用,可以将导轨面朝下实现滑动效果,反过来时可以将4个脚垫卡进主体的四个圆孔内稳定,利用7个导轨实现手机支架的功能,手机竖着可以全部角度,手机横着可以使用靠内的2-3根轨道固定 Install the four plastic feet for the movable platform. Due to potential size variations in different materials, I suggest using acrylic glue to secure the four feet to the bottom of the board. After it dries, the sliding effect can be achieved by placing the guide rails facing down. When reversed, the four feet can be inserted into the four circular holes of the main body for stability. Utilize the seven guides to create a phone stand—vertical placement allows for various angles, while horizontal use can be secured with 2-3 inner tracks. 5. 安装后挂架,使劲按进主体的背部菱形卡槽,也许能稳稳的卡进去,但还是建议使用胶水固定,干了后再使用 Install the hanger by firmly pressing it into the diamond-shaped slot on the back of the main body. It might stay securely in place, but it is still recommended to use glue. Wait for it to dry before use. 6. 安装两个盒子,注意把手方向朝外 Install two boxes, ensuring that the handles face outward 7. 底部一整块塑料的摩擦并不会很足,建议买点小的橡胶贴,贴四个角就可以很稳固 The friction on the entire bottom plastic may not be sufficient. It is recommended to buy small rubber pads and attach them to the four corners for stability. 8. 安装完成,另外你可以将SD卡、CFA卡、TF卡放进中间的卡槽内,它们不会干扰移动平台;主体上还有2个usbc、1个usb的槽,可以稳稳固定住线缆的头部;更多可能等你发掘 Installation complete! Additionally, you can place SD CFA and TF cards in the middle slot without interfering with the movable platform. There are also two USB-C and one USB slots on the main body to securely hold cable heads. Explore more possibilities~ enjoy your a1 mini cute version 【可能遇到的问题Possible Issues】 我一共打了4次,每次都是使用PETG材料,所以PLA的效果我没有测试,但我认为PLA应该是有更加快的速度以及更好的悬垂,桥接效果的,欢迎你分享出使用PLA的效果 ;I printed a total of 4 times, all using PE