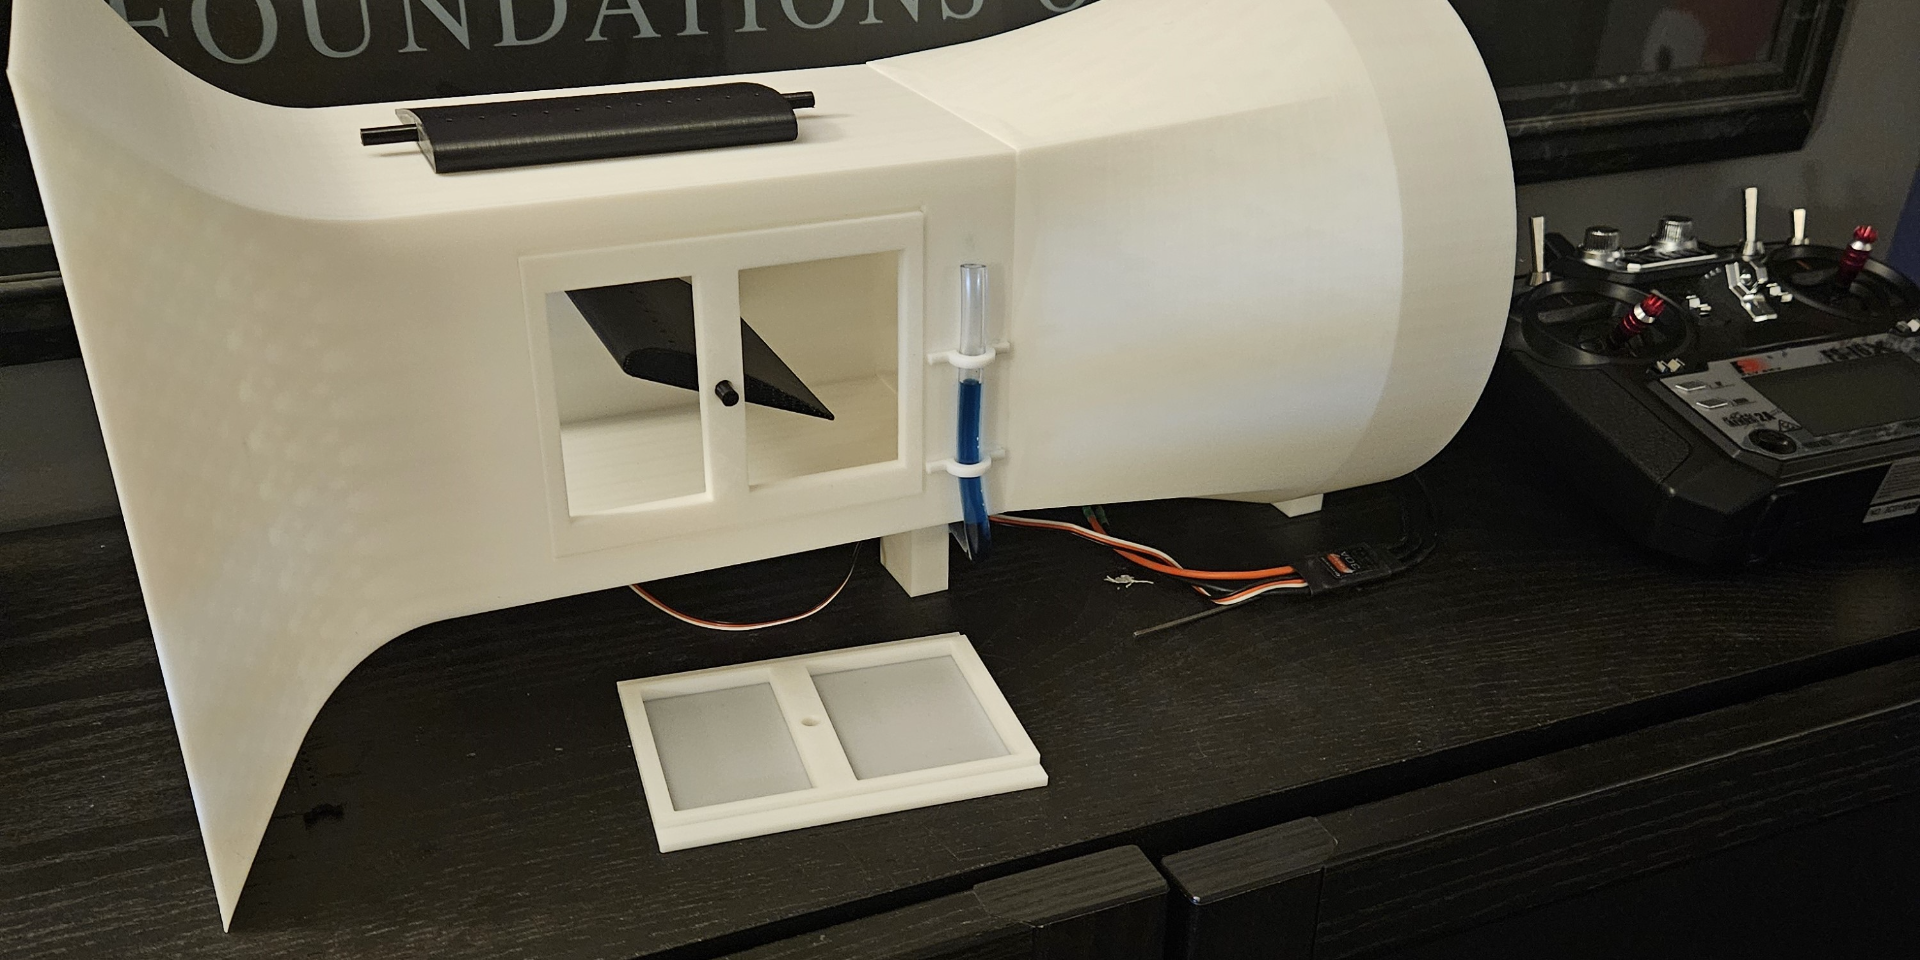
About this 3D model
Wind Tunnel Model This model features a functional wind tunnel. Great for STEM education! The wing section has pressure ports modeled. When connected to a tube filled with dyed water, the change in pressure from various angles of attack and fan speed will cause the water level to change (called a monometer). Two doors are provided (1 to seal test section for best pressure recordings, 1 is open to view the wing section). Assembly Glue forward and aft wind tunnel sections together Put wing section spindle through forward wing tunnel section Put oppose wing section spindle through door (do not glue door; it will be pulled shut by pressure change when tunnel is on) Glue wing leaver to the wing section spindle (make sure you do not glue the wing to the forward wind tunnel section!! – leave a small gap between lever and tunnel). The leaver should be aligned to the direction of the wing (just needs to be close; perfection not required). Attach ¼" OD tubing to end of wing section Mount tube to wind tunnel with tube ties with glue Attach a stiff wire from the leaver to a servo this step requires testing to make sure that the wing can reach full range of motion. test, make small adjustments, and repeat as necessary. may need to drill leaver to larger hole diameter to match wire diameter chosen Mount servo to the bottom of the forward wind tunnel section Mount 6" fan + motor to the aft wind tunnel section make sure the motor is flush with the surface of the print. if it is not flush, you may need to make some slight modifications (typically drilling) to get it to sit flush to the surface. the motor below may come with a center standoff that requires a 5/32" hole at the center of the fastener pattern. Connect motor to an ESC (electronic speed control) this step may require soldering wires to bullet plugs or directly connect ESC wires to motor wires recommend wrapping soldering with shrink wrap tubing Connect ESC to battery Connect receiver to ESC Pair receiver with transmitter Power up & enjoy!! Parts Transmitter Battery ESC Wires Servo Motor Propeller Connector Plugs ¼" OD / 0.17 ID clear vinyl tubing Push rod (stiff wire) - cut to length and debur heat shrink tubing soldering iron needed to solder wires to bullet plugs or directly connect motor to ESC Revision Log 19 Jan 2024 updated aft section to improve motor mount (thickness 0.08", add center hole) Update wing section to improve tube attachment (slightly longer spindle)