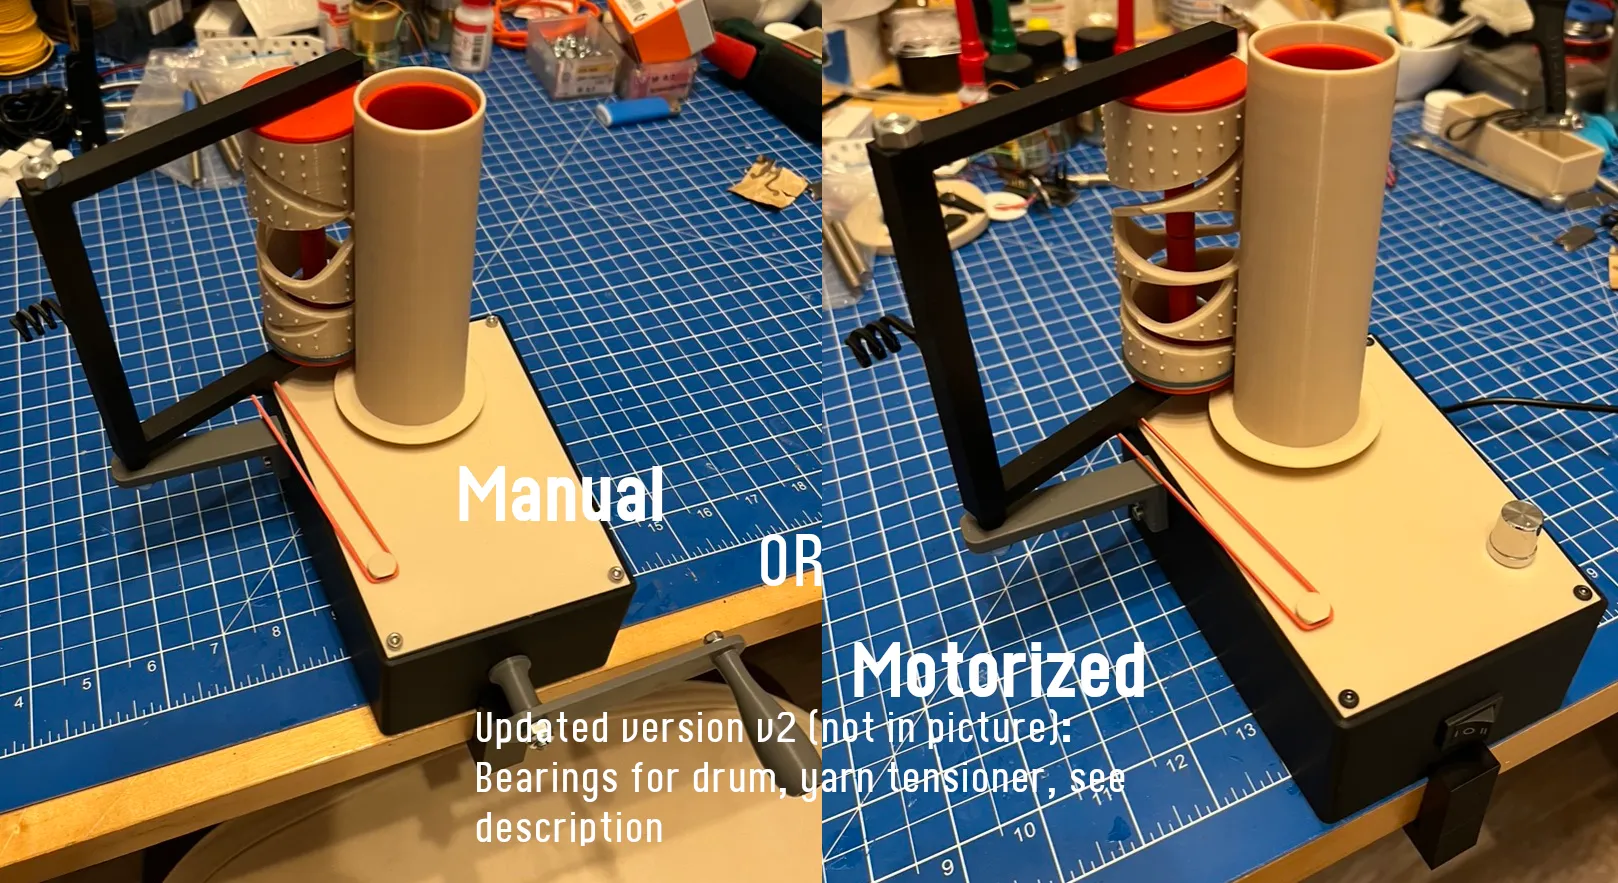
About this 3D model
Wind your yarn skeins to a cone for knitting. This winder comes in two main versions: manual and motorized, see description and STL folder structure for further details. (Due to continuous design upgrades, I will not replace every picture posted to reflect all the changes made, but add additional pictures, so that you can judge yourself what has been changed.) Notable changes, mostly improved through kind maker's comments: 29.01.2024 - added two more screws for the lid, improves stability and makes winding a bit more quiet - added a 45mm clamp screw - added new lubrication attachment, for use with large Brother paraffin rings 05.02.2024 - added different size lubrication attachment, for use with small Brother paraffin rings The choice is up to you… Choosing the main version You can choose between a motorized and a manual version. The STL folder names reflect the parts to print. Choosing a cone variant If you don't have any cones yet available, you can choose between my own cone variant or between a Royal/Empisal/Knitmaster compatible cone. Print both corresponding parts, obviously you only need the holder once, print as many cones as you like. If you already have Royal-compatible cones, you only need the corresponding holder. Hints regarding the (optional) Quickchange version: As I often have to change the cones during modeling, I developed a quickchange mechanism, so that I don't have to unscrew everything to change the cone type I want to use. You print the mount only once and also every holder only once. Then you can simply slide the holder you want onto the mount and use the corresponding cone. I think, for most people it is not relevant as they will use only one type of cone, so it is more a developer kind of feature, but I thought it might be interesting for people who want to remix the cone holder and don't want to mess with screwing/unscrewing everthing only for testing purposes. Print settings Print all parts once, only those marked (x2) two times :-). See STL file name comments in brackets for versions or additional information. 0.16 layer height grooved drum: 4 walls fork arm: 4 walls, 35% infill clamp: 4 walls, 45% infill all other parts: 2 walls, 15% infill Choose a clamp and screw combination that fits your table best. Tree support (!) only for obvious parts. Use manual supports for the spring-like yarn guide on the drum fork for easy removal. If the yarn cone slips too easily over the holder and does not really stop by friction, adjust your print settings (slightly reduce XY size of cone), or simply use a bit of tape on the inside of the cone to narrow it a bit. See 3mf file and plate names for details. Regarding printing the grooved drum Your printer has to be dialed in rather well regarding tree supports - it will be nearly impossible to print with normal supports. See pictures for details. It is absolutely important that you orient the drum as shown to minimize support and to get the best surface quality. You can imagine, the more support artifacts you have, the more you have to sand later on, the surfaces have to be really smooth so that the yarn can slip easily. After removing the support (you can see, it is possible to remove the support all at once), check the surfaces for artifacts and sand accordingly. It is really helpful to have a deburring tool for 3D prints (like these: https://www.amazon.com/s?k=deburring+tool+3d+printing ) Additional parts Parts needed for both versions: (as some parts are needed in different amounts, see parenthesis for further details) M6 rod 147 mm (grooved drum fork shaft) M6 rod 66 mm (winding shaft) M6 rod 20mm (connection between upper and lower grooved drum cap, loose fit) M6 nyloc hex nuts (manual 4x, motorized 3x) M6 normal hex nuts (manual 2x, motorized 1x) - lock big gear in place (only in manual version) - top of fork shaft (so you can hand-adjust how tight or loose the drum fork can move) M3 screws 6mm (manual 4x, motorized 11x) M3 screws 20mm (2x, fork arm) M3 screw 35mm (1x, yarn tensioner) M3 hex nuts (2x, fork arm inside housing) Skateboard bearing 608-2RS (3x) short rubber band (for grooved drum) long rubber band (as drum fork spring, not too strong!) Only for manual version: M6 rod 140 mm (drive shaft) flatten ends 10mm (crank handle side) and 15mm (gear side) wide, see picture M4 screw 35 mm (1x) M4 hex nuts (2x) Only for motorized version: 12V 550 RPM DC motor ( https://www.amazon.com/Greartisan-Electric-Reduction-Centric-Diameter/dp/B072R5G5GR ) 12V DC speed controller ( https://www.amazon.com/CenryKay-Controller-Adjustable-Reversible-Switch(2PCS/dp/B09TGZ5MRN ) 12V DC power socket, choose what fits best for you (i.e. https://www.amazon.com/MEETOOT-5-5mm-Female-Socket-Electrical/dp/B09JP19XKP ) Assembly Instead of a long assembly essay ;-), see pictures for details, I think you will not get into any further problems / see last pictures on how to fit the components for motorization. I will not get into any details here on how to wire every