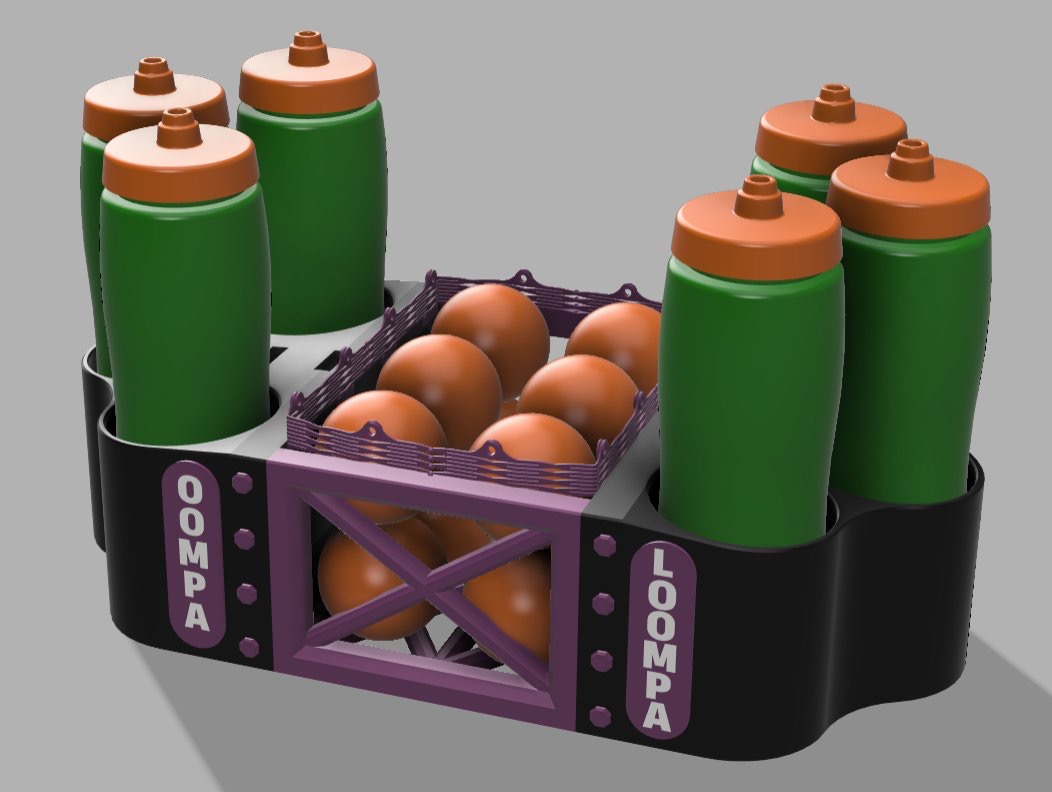
About this 3D model
I designed this Carrier for my Dek Hockey team so that we could carry water bottles and balls together in a “neat” package. It's almost a full TPU design, needed something impact resistant with good wear resistance and which would keep some of its flexibility in cold temperature, as it will most likely stay in the car during winter. Features: The whole body is made of TPU and the assembly features are taking full advantage of the TPU's flexibility. Even if it's in TPU, it's really sturdy and the weight of the water bottles is not deforming the carrier. 2 lifting configurations with holes for a 20mm nylon strap. 1 Strap in the middle 2 Straps towards the side An optional flexible net to keep balls in the Carrier. Customizable Name Plates. Overall dimensions: Length: 470mm/18.5in Width: 240mm/9.45in Height: 112mm/ 4.41in (not including net) Bottle diameter: 85mm/3.35in Note: This is the first iteration of the design, it's functional but not perfect, feel free to modify it as you like. Main Body MainBody_BottleHoder_1Strap or MainBody_BottleHoder_2Strap (2 Required) : Material: TPU Infill: 20% (Depending on the stiffness of your TPU 15% might be sufficient) Supports: 1 Strap version: Recommended. The biggest gap to bridge is a little over 20mm for the Strap Holes. 2 Strap version : Optional. The biggest gap to bridge is about 10mm in sections which are not visible. MainBody_Side (2 required): Material: TPU Infill: 20-25% (Depending on the stiffness of your TPU) Supports: Optional but I used some for the holes at the bottom MainBody_Bottom (1 required): Material: TPU Infill: 20-25% (Depending on the stiffness of your TPU) Supports: Optional MainBody_AttachingPin (16 required): Material: TPU Infill: 50+% Supports: I used the following orientation. You can print them upright (I simply didn't wanted to have the build plate texture) How to Assemble it: You need to bend the “L” tabs from the Bottom part in the related holes in the other parts. What I found works best is to engage the first portion in the hole then use a screwdriver with a square bit to push it in place. It will get progressively harder to get them in place, but that's where the TPU's flexibility helps. Once the Bottom part is fully engaged in all the parts, simply push the Attaching Pins in place. For the Strap, I've used a 20mm nylon strap and printed one of the many available design of adjusters. For the model with 2 straps, you could probably print a handle to join both strap together. Customizable Name Plate I've included the “blank” version of the Name Plates. You can add your own wording/design on them. NamePlate_Blank (4 Required): Material: Any Infill: 15% Supports: Not required. How to Assemble it: Simply snap them in place in the related holes in the Main Body. Flexible Net (Optional) The Net has a 1mm thickness so if you want it to be a bit more strong, simply increase the thickness of it, just make sure to increase the gap in the insert accordingly. Flexible_Net (4 required): Material: TPU Infill: 15% Supports: Not required. Net_Insert (12 required): Material: PETG Infill: 15% (I suggest using the “Concentric” pattern) Supports: Required. How to Assemble it: Place the Inserts in the related holes in the Nets. Then, join the Nets together and simply “snap” the Nets in the related holes in the Main Body. The joint between each Net sections should be in the middle of each part. For the Cord and Spring loaded Lock I simply used some that I had at home (The hole in the Insert has a 4.30mm diameter).