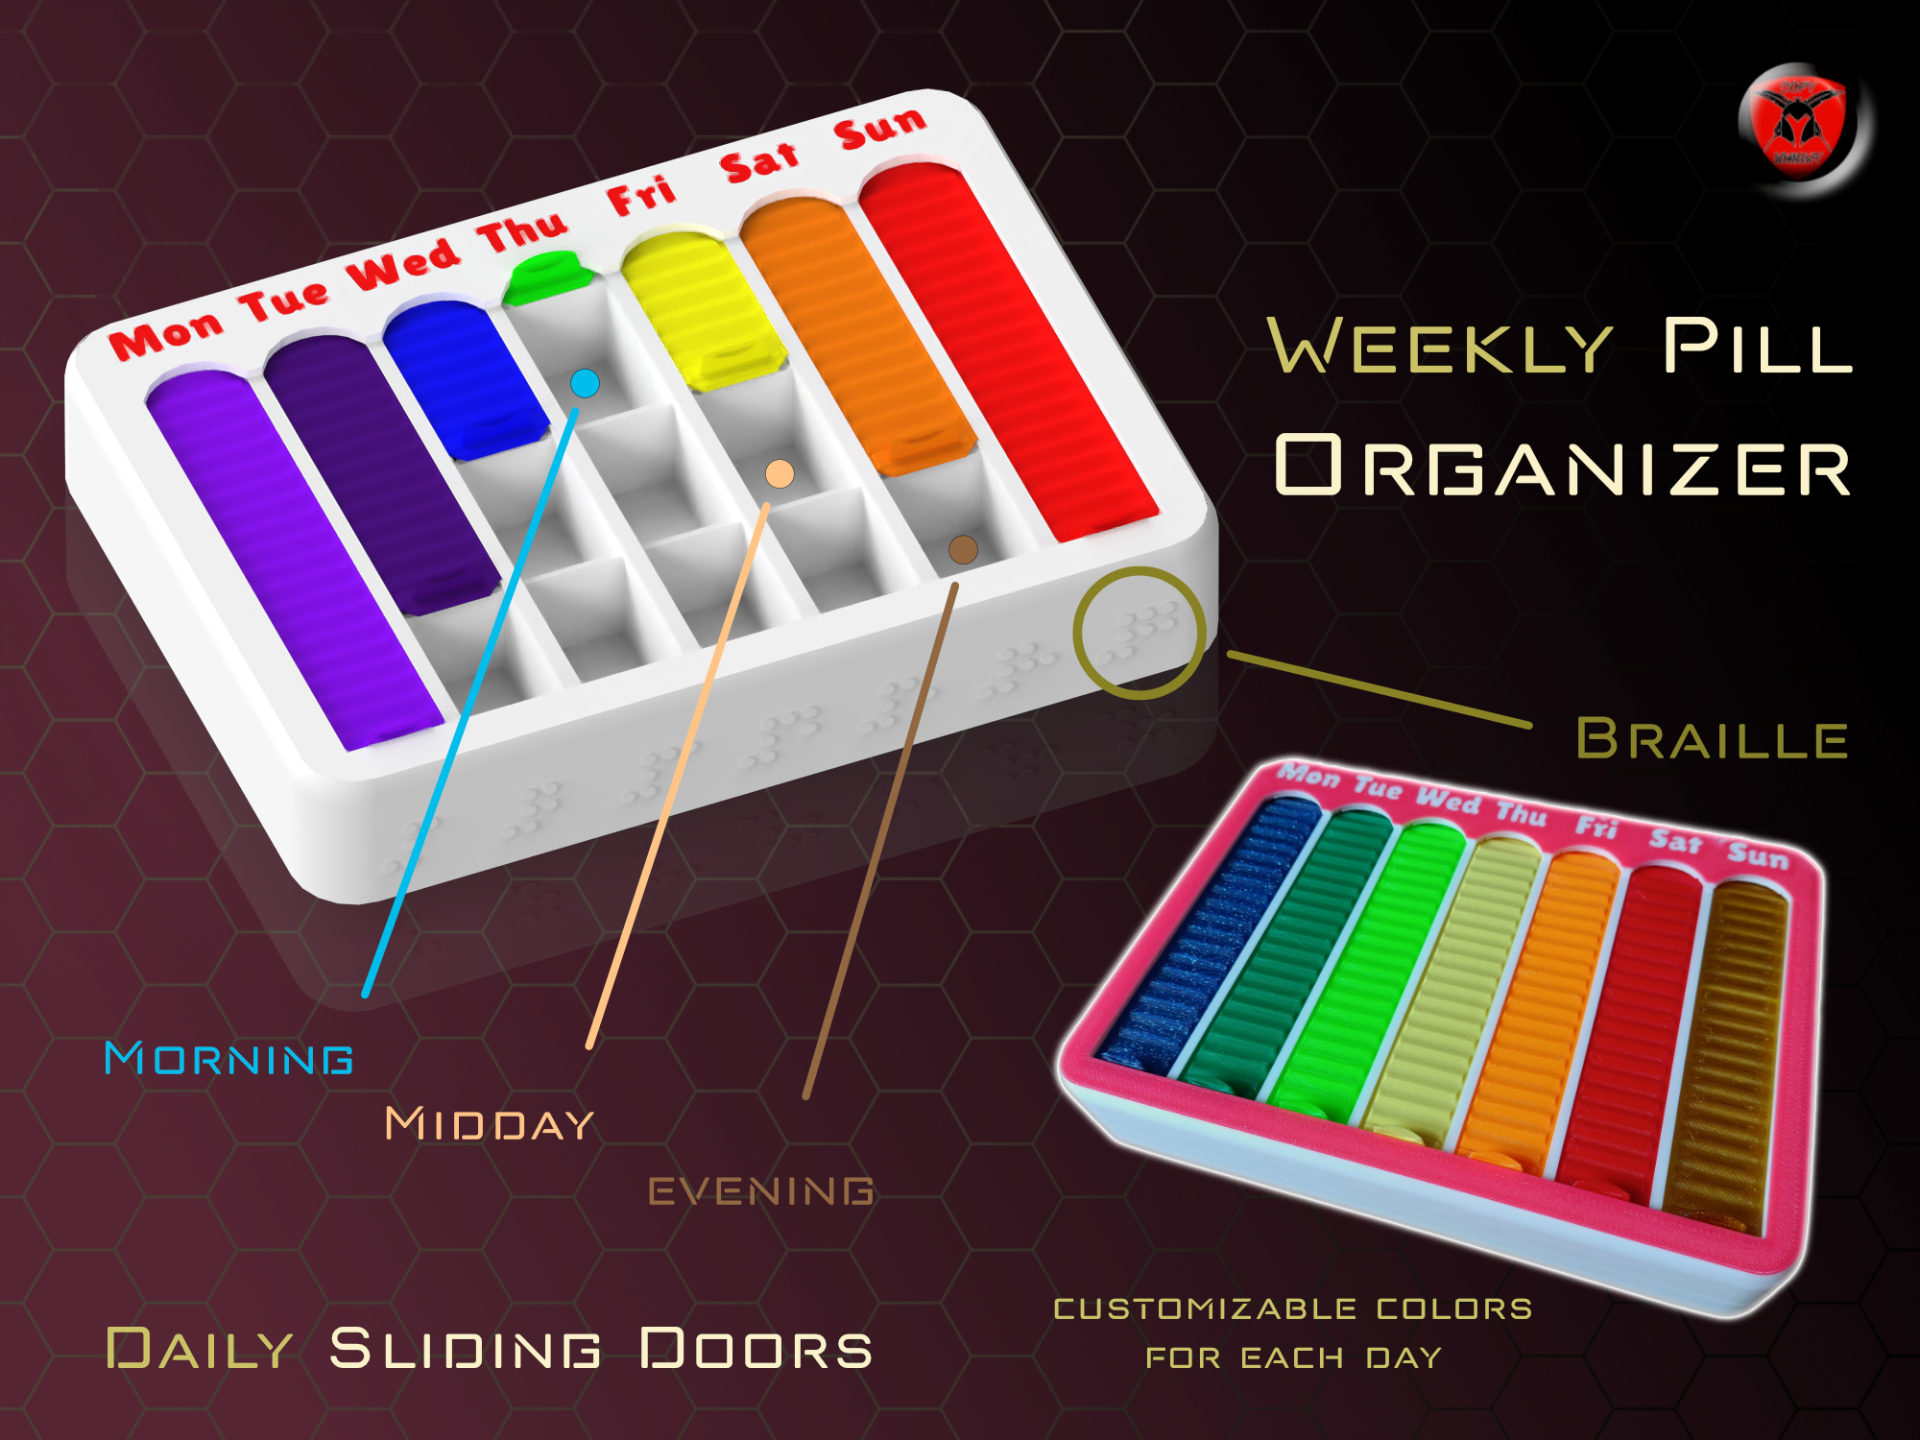
About this 3D model
Boost Me Every boost helps further development! Every boost contributes to further development! German Upgrade Part V2 with new Print Profile. Upgrade Part V2 with new Print Profile. Upgrade Part with new Print Profile. Weekly planner for tablets with Braille and sliding doors Printing and assembly are straightforward. All parts can be printed with a 0.2 layer height and a 0.4 nozzle without support. The sliding doors are ideally printed with a 0.1 layer height. It is crucial that the concave insert is printed upright, as this creates a rounder surface for the sliding doors. Assembly: Part 1: You have the lower part in front of you. Part 2: Now add the concave insert. Part 3: Insert the concave insert, with the seven small roundings facing upwards, into the recess provided in the lower part. Part 4: Now add the convex insert. Part 5: Insert the convex insert into the concave insert Part 6: Now add the pill insert Part 7: Insert the pill insert into the recess provided in the lower part Part 8: Add the sliding doors Part 9: Slide the sliding doors into the pill insert from the front and push it through the recess provided between the convex and concave insert. Slide all the doors back and forth a few times and leave them for the time being at approximately half of the middle compartment. Now do this with all the other six doors. Part 10: Now add the top section. Part 11: Place the top section from above evenly and parallel over the model you have assembled so far. Once you have overcome the first small hurdle and all four sides of the inner inserts, press the upper section further down until it snaps into the lower section. Finished :) Weekly planner for tablets with Braille and sliding doors Simple printing and uncomplicated assembly. Everything can be printed with a 0.2 layer height and a 0.4 nozzle without support. The sliding doors should ideally be printed with a 0.1 layer height. It is important that the concave insert is printed upright, as this creates a rounder surface for the sliding doors. Assembly: Part 1: You have the lower part in front of you. Part 2: Now add the concave insert. Part 3: Insert the concave insert, with the seven small roundings facing upwards, into the recess provided in the lower part. Part 4: Now add the convex insert. Part 5: Insert the convex insert into the concave insert Part 6: Now add the pill insert Part 7: Insert the pill insert into the recess provided in the lower part Part 8: Add the sliding doors Part 9: Slide the sliding doors into the pill insert from the front and push it through the recess provided between the convex and concave insert. Slide all the doors back and forth a few times and leave them for the time being at approximately half of the middle compartment. Now do this with all the other six doors. Part 10: Now add the top section. Part 11: Place the top section from above evenly and parallel over the model you have assembled so far. Once you have overcome the first small hurdle and all four sides of the inner inserts, press the upper section further down until it snaps into the lower section. Finished :)