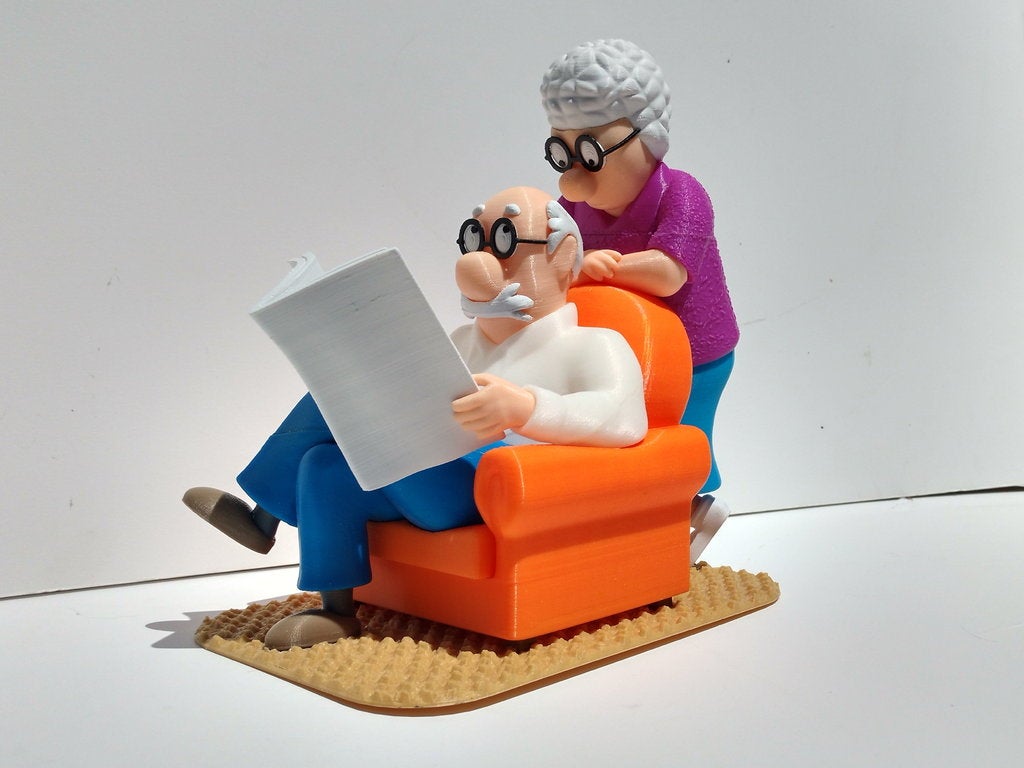
About this 3D model
A scene from the 'Pickles' comic strip. If you are unfamiliar with the Pickles comic strip, by Brian Crane, I strongly suggest checking it out on the web. The characters are just that, they are 'characters' and my wife and I love the strip. The husband's name is Earl and the wife's name is Opal. The picture that I used for modeling is from the 25th anniversary of the strip and is included below. The completed model after assembly is 128mm x 189mm x 203mm high and none of the parts require supports! Enjoy! Print instructions Print Settings Printer: FlashForge Creator X Supports: No Resolution: .2mm Infill: 10% Notes: A few of the smaller pieces may need a brim/raft. See below for specific printing suggestions (just suggestions as each user has personal preferences for small parts). Building the model Colors and multiple printed pieces Following are the colors that I used and notes if pieces are to be printed multiple times. Consider this simply as a guide as to which pieces need to have the same color. .. Skin/Beige: earl_arm_right earl_arm_left opal_arm_right opal_arm_left opal_leg_right opal_leg_left opal_head earl_head .. White: earl_hair_top earl_hair_bottom opal_hair opal_shoe_left opal_shoe_right newspaper earl_eyebrow_right earl_eyebrow_left earl_moustashe_top earl_moustashe_bottom earl_eyewhite_left earl_eyewhite_right opal_eyewhite_right opal_eyewhite_left .. Any color (hidden piece): bump (8 copies) .. Black: eyeblack (four copies) earl_glasses opal_glasses .. Brown: chair_leg (four copies) earl_shoe_right earl_shoe_left .. Grey: earl_leg_right earl_leg_left .. Natural (off-white): earl_shirt_bottom earl_shirt_top .. Purple: opal_shirt_top opal_shirt_bottom .. Light Blue: opal_skirt .. Dark Blue: earl_pants_top earl_pants_bottom .. Orange: chair chair_cushion .. Light Brown/Gold: rug Printing and assembly tips Printing tips: -Take particular care with left and right pieces. Many of them look very similar but are not the same. -When printing the eyeblacks I left the extra brim on instead of cleaning up the pieces. This resulted in a clean fit into the eyewhites and result in a solid eyeblack showing. -For small pieces I personally print them at 50% infill and two shells. This ensures plenty of time for clean prints on my printer. Assembly tips: -The diagram below will help in assembling the model. A larger copy is included in the downloads section -The model is meant to be glued together. Be careful when gluing to ensure that you do not 'glue yourself into a corner'. The hands/arms/legs need to be glued in at the same time that the connecting pieces are glued, so that you have room to position them. -Both eyeglasses are placed on the faces with the bridge down, just over the nose. This might not be obvious from the diagram.