About this 3D model
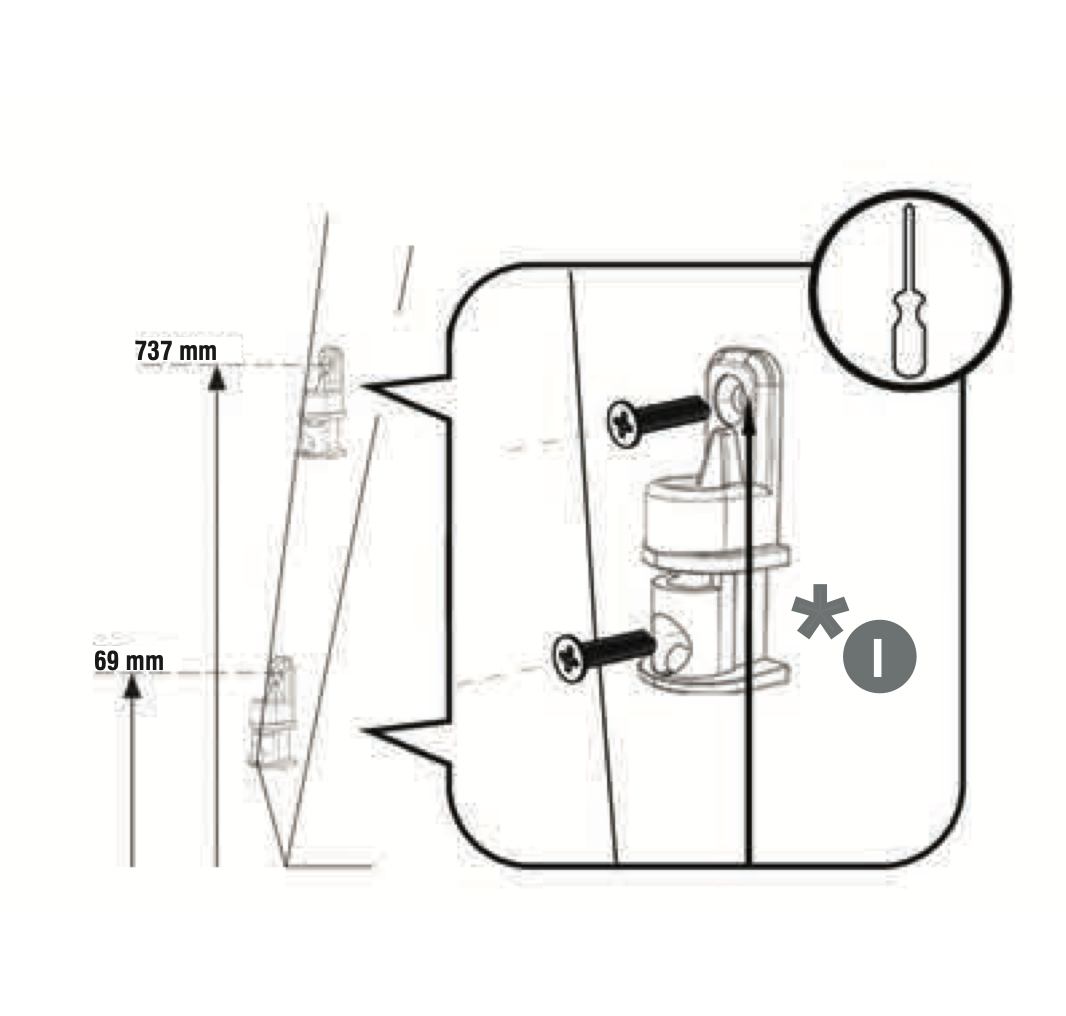
Assembling 3D-Printed Stair Gate Hinges with Durable Materials (ABS, PET, or PA) Description: In this guide, we'll walk you through the step-by-step process of assembling 3D-printed hinges for a stair gate using robust materials such as ABS (Acrylonitrile Butadiene Styrene), PET (Polyethylene Terephthalate), or PA (Nylon). Follow these instructions to ensure a sturdy and reliable installation. Materials Needed: 1. 3D-printed hinge components (ABS, PET, or PA) 2. Screws compatible with your chosen material 3. Screwdriver 4. Level 5. Measuring tape Step 1: Prepare Your Components Ensure that all 3D-printed hinge components are printed accurately and without defects. Check for any residual support material and clean the parts thoroughly. Step 2: Identify Hinge Placement Determine the optimal placement of the hinges on the staircase railing. Use a measuring tape and level to ensure precise alignment. Mark the positions where the hinges will be attached. Step 3: Pre-drill Holes To prevent material from cracking, pre-drill holes at the marked positions using a drill bit. Be sure to select a drill bit size that matches the screws you'll be using. Step 4: Attach the Hinges Securely attach the 3D-printed hinges to the pre-drilled holes using screws. Ensure that the hinges are aligned correctly and sit flush with the railing. Step 5: Test the Movement Verify that the hinges allow smooth movement for the gate. Open and close the gate to confirm that the hinges provide the desired functionality without any interference. Step 6: Fine-Tune if Necessary If adjustments are needed, make them carefully. This may involve repositioning the hinges or tweaking the screw tightness to achieve the desired movement. Step 7: Secure Additional Components If your design includes additional components, such as locking mechanisms or decorative elements, secure them according to the design specifications. Step 8: Final Inspection Perform a final inspection to ensure all components are securely fastened, and the railing operates smoothly. Make any last-minute adjustments as needed. By following these steps, you'll successfully assemble 3D-printed hinges for your staircase railing using durable materials, ensuring a reliable and long-lasting installation.