About this 3D model
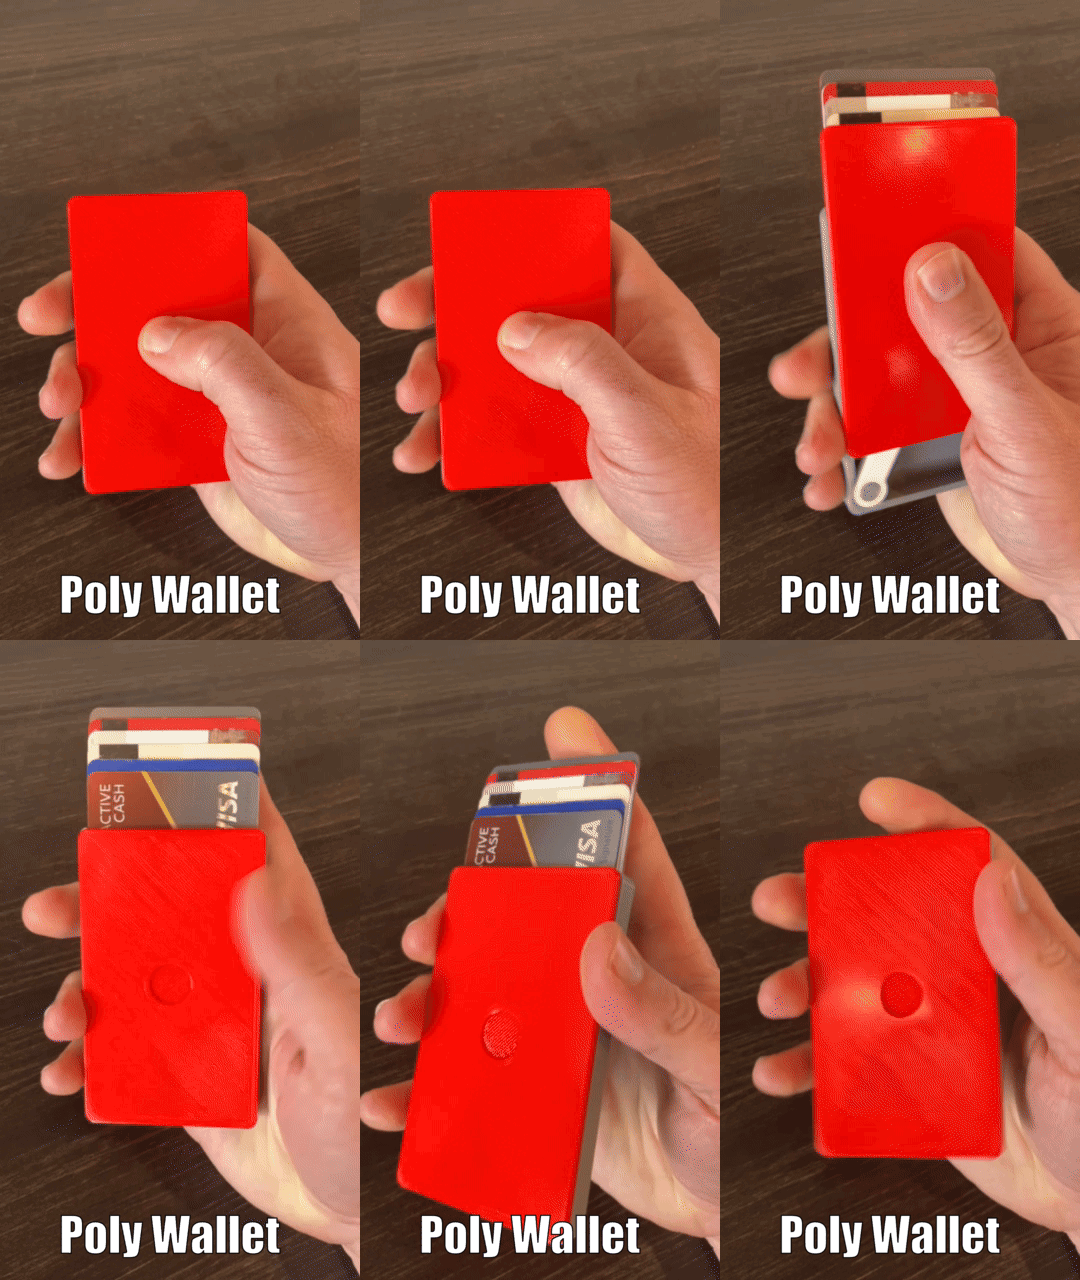
NEWEST VERSION: https://makerworld.com/en/models/2455487-spinny-wallet-fidget-cascade-wallet#profileId-2696111 Update: on the 2-year anniversary of Poly Wallet I’ll be releasing a 2.0 version. I will link it here once published. A few of the notable updates: - Strengthened the tension arm and rails. - Fixed the slim version, dimensions are nearly identical but holds 5 cards. - Designed a cash drawer and larger version to accommodate it and 7 cards, or more cash and 5 cards. - Standard wallet fits 7 cards, or 2 cards and cash drawer. - Snap indentions for future accessories. - I recently got a P2S, so I’ve prototyped on a Bambu printer, and will publish print profiles. — Summary The Poly Wallet is a slick plastic wallet for your plastic. Holds 6-7 credit cards, or 4-5 credit cards and 1 key card. Drop a like! Prototyped with a 0.4mm nozzle, 0.2mm layer height. Sliced with Cura, printed on an Ender 3. UPDATE : I added a slimmer version designed to hold just 4 cards - total thickness around 9 mm (original is about 12 mm thick). Also shortened one of the rails on the base to match the other/prevent catching on the end. The 6- and 4-card base and covers are interchangeable - but you'll have to make sure you have the correct lever (original lever with original base, and 4-card lever with 4-card base). Notes You only need to print 1 cover. See the OPERATION Lock and Return Variation sections for details on the differences in function between the covers. The images, including the gifs, show the “middle lock” cover. I tested many prototypes (15+) but I’m sure there are improvements to be made. The images do not show the most up-to-date version, but are close. I'm working on extras including: No-lock cover Cash holder Others (if it proves popular) … Extras mentioned are available for FREE at Printables: https://www.printables.com/model/758318-the-poly-wallet-slim-pop-up-wallet Get permission to sell: https://buy.stripe.com/cN26ssd2T3Od400eUV Donations appreciated: https://buy.stripe.com/28o8AA8MDgAZ2VW6oo ASSEMBLY See images. Remove any support, raft or brim. Place lever onto base knob/pin. Slide Cover onto base track. Slide Cover until lever knob/pin enters cover track. Place cards into wallet. If there is any annealing on the first layer between the stopper arm and the base, you will need to separate them when you first put cards in. Carefully push your cards in, with some force. If you need to remove the cover, remove the cards and tip the wallet on its left side. From the starting position, slide the cover up. If the lever doesn’t fall into the entrance/exit track, push it down with your finger. Then slide the cover all the way off. OPERATION Stopper There is a small arm on the upper right corner of the base that prevents cards from falling out, and applies some tension when sliding out cards. If you slide the cards out into a cascade AND tip the wallet upside down, the stopper will probably not prevent the cards from falling out. Cascade As you slide the cover up, the track forces the lever up - cascading the cards outward. Cover Variations Middle Lock Cover Lock: When you return the cover to a position in the middle of its track, it will lock the cards in the cascade position and prevent them from falling back into the wallet. Return: To return the cards, return the cover to its starting position and press the cards down. Lower Lock Cover Lock: When you return the cover to its starting (lower) position, it will lock the cards in the cascade position and prevent them from falling back into the wallet. Return: To return the cards, slide the cover to its fully-extended position, then press the cards and cover down. PRINTER SETTINGS Layer Height 0.2 mm Base Adhesion: Normal settings (unless elephant's foot removes bottom edge chamfer) Infill: Recommend 100% Supports: No Cover Adhesion: Normal settings (unless elephant's foot removes bottom edge chamfer) Infill: Doesn't matter Supports: Recommend normal supports Lever Adhesion: Normal settings. Note: If you get elephant's foot, I recommend using a raft or adjusting other settings. It's very important that there is no elephant's foot on the lever. Infill: Recommend 100% Supports: No Print Settings Printer Brand: Creality Printer: Ender 3 Rafts: Doesn't Matter Supports: Yes Resolution: 0.2 Infill: 100 Filament: Hatchbox PLA Red