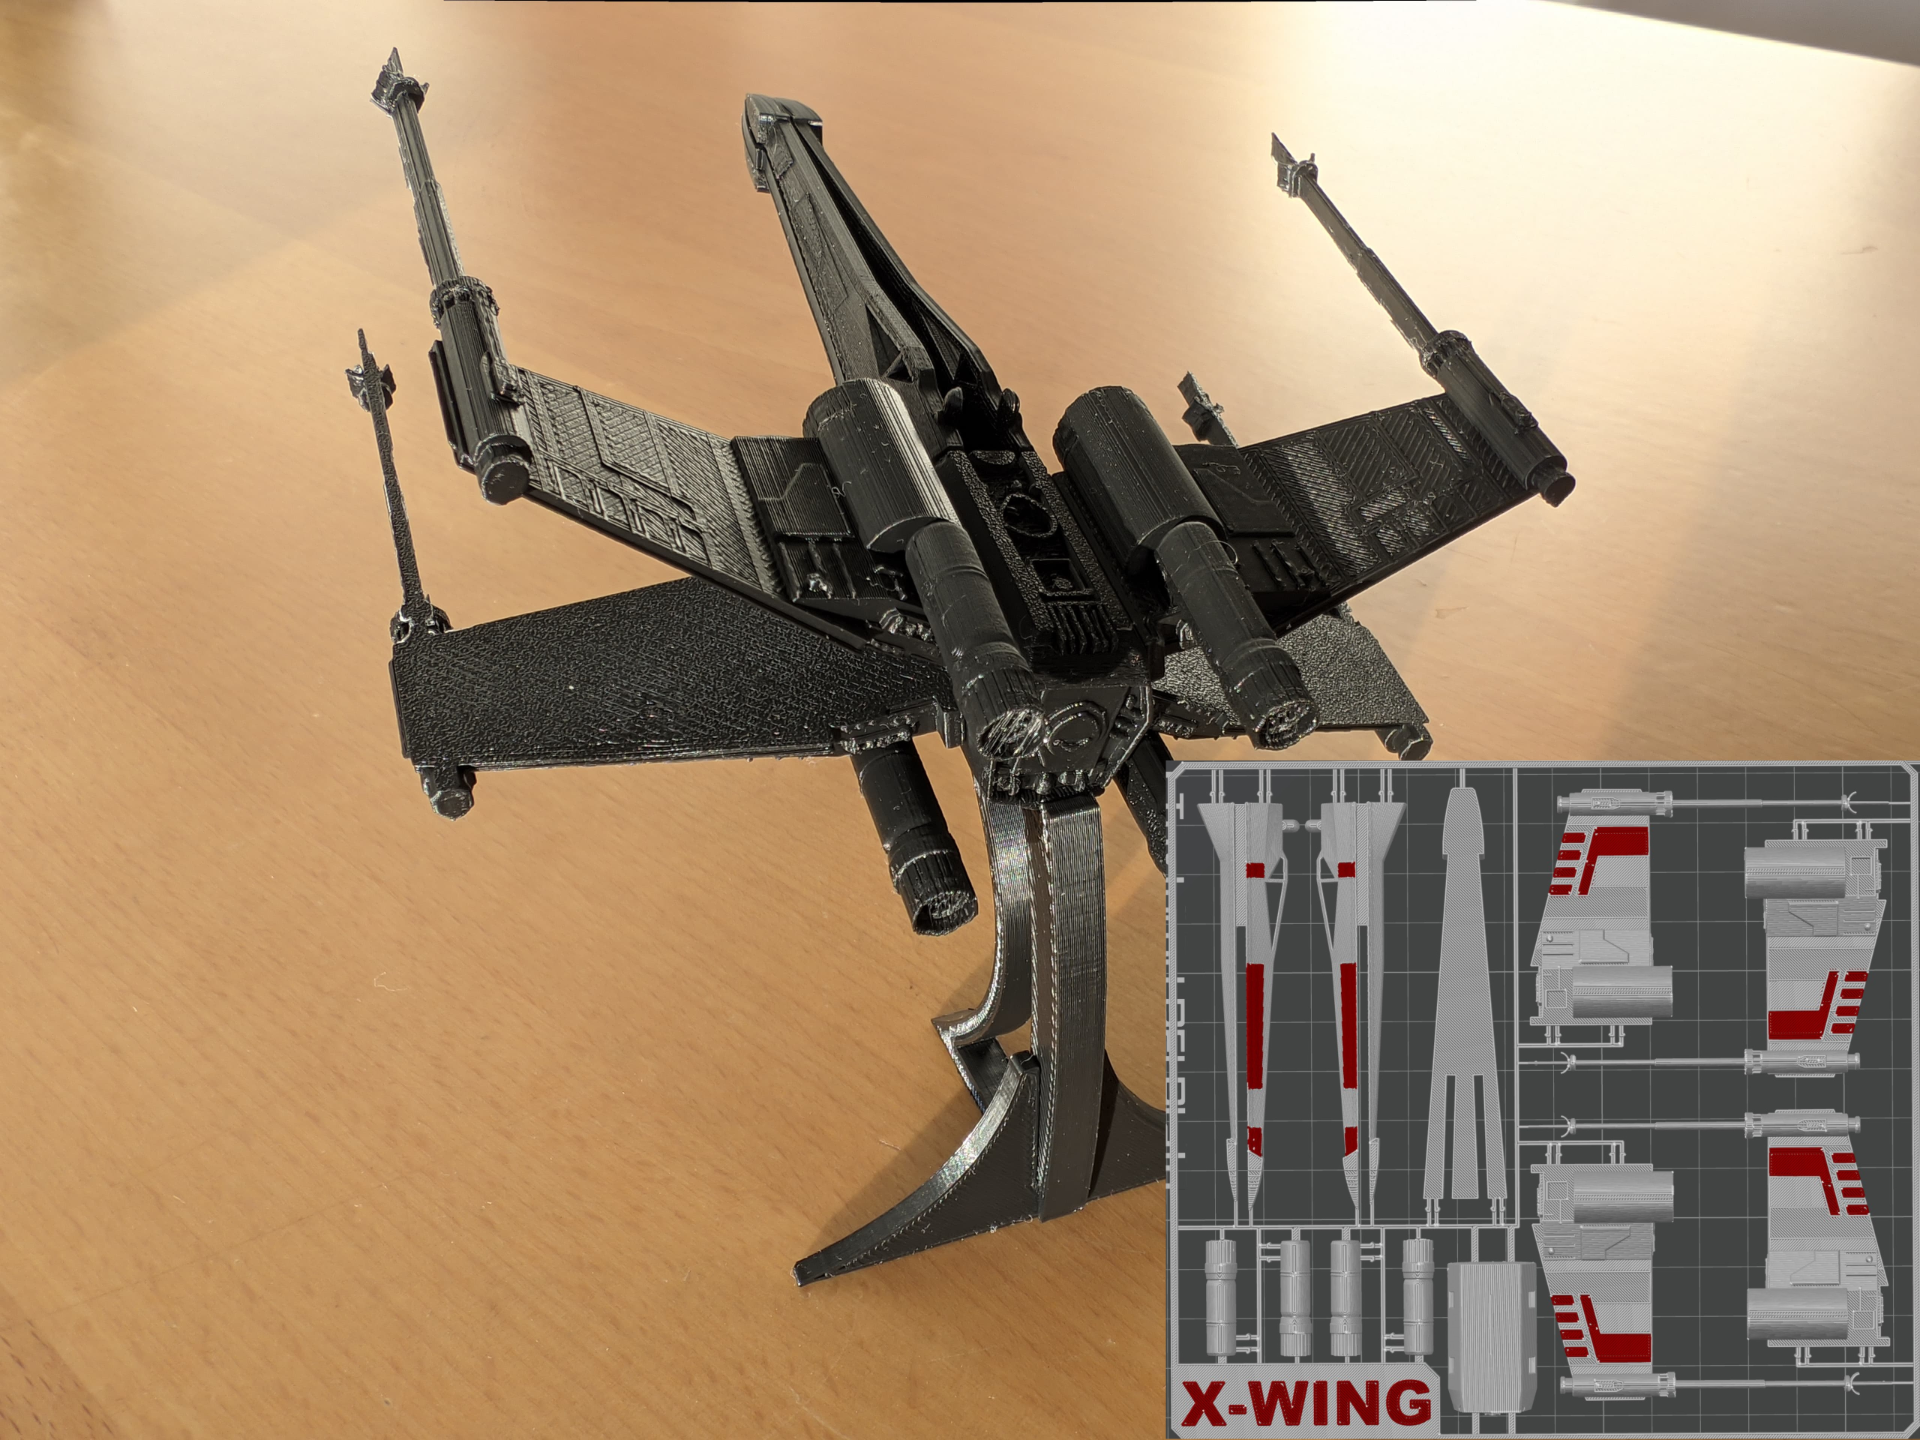
About this 3D model
Boost Me Matching stand can be found here Check out my MagLev Millennium Falcon Check out my other Kit Cards: Imperial Lambda Shuttle Millennium Falcon Check out my other High Detail Models: Lambda Shuttle Millennium Falcon Embark on a captivating building journey with the " X-Wing Starfighter Kit Card ," a meticulously designed piece that encapsulates the essence of the iconic craft from the Star Wars saga. After a challenge from a friend questioning the existence of high-detail kit cards for the X-Wing, this near-perfect replica was born. Perfect for model hobbyists, collectors, and Star Wars enthusiasts of all ages, this kit allows you to immerse yourself in the construction and display of an intergalactic legend. Features: Authentic Kit Card Assembly: Each component of the X-Wing is precisely engineered and presented on a kit card for easy identification and removal. No detail is too small, mirroring the complexity and intricacy of the legendary starfighter. Functioning Features: The model includes movable S-foils and a detailed cockpit, capturing the dynamic nature of the X-Wing in combat. Exquisite Detail: With an astonishing level of detail, this model echoes the design of the original starfighter, from the texture of its hull to the subtleties of its laser cannons. Engaging for All Ages: This model offers an enjoyable and insightful assembly process, inviting builders to appreciate the mechanical and aesthetic aspects of the X-Wing. Simple Yet Detailed Construction: The clear and comprehensive instructions provide an effortless building experience, allowing for a fully detailed model without the need for additional tools. A Nod to Nostalgia and Craftsmanship: Ideal for those who relish the artistry behind model-making and the cultural impact of the Star Wars universe. Construct your own X-Wing Starfighter today, and revel in the assembly of a miniature marvel that's not just a model, but a high-fidelity homage to engineering and imagination. Spare Parts can be found in the RAW Files. X-Wing Starfighter Assembly Guide Congratulations on acquiring your own X-Wing Starfighter Detailed Model Kit. Follow this step-by-step guide to bring your starfighter to life. What You'll Need: The X-Wing Starfighter kit, which includes all wings and the main body. A clean, flat surface for assembly. 1. Step: Wing Attachment Prepare the Main Body: Locate the main body piece of your X-Wing model. This is the central fuselage that houses the cockpit and engines. Identify the Wings: You should have four wing pieces. Two of these are for the left side and two for the right side. They are mirror images of each other, with laser cannons on each tip. Wing Attachment: Take one of the wings and align it with the corresponding side on the main body. You will notice pins on the wings designed to fit securely into the holes on the main body. Secure the Wings: Gently but firmly, press the pins of the wing into the holes of the main body. The side of the wing that was facing the build plate during printing (usually flatter and may have more markings) should face inwards, towards the body of the ship. Repeat this process for all four wings, ensuring the cannons are facing forwards, in the direction the cockpit is pointing. Final Check: Once all wings are attached, give them a gentle tug to ensure they are securely in place. The wings should be level and symmetrical when viewed from the front or back. 2. Step: Cockpit Attachment With the wings securely attached, your next step is to assemble the cockpit and the nose of your X-Wing Starfighter. Here's how to continue your journey to a galaxy far, far away. What You'll Need: The left and right cockpit halves. The nose part of the X-Wing. The assembled main body from the previous steps. Assembly Instructions: Prepare the Cockpit Halves: Identify the left and right sides of the cockpit. They are uniquely shaped to fit together only one way. Check the interior detailing to ensure they are correctly oriented. Align the Nose Part: Before joining the two halves, locate the nose part. This piece should have a distinct top and bottom, with the top likely having more detailed texturing. Confirm that the nose part is correctly oriented with the printed side facing downward as shown in the reference picture. Join the Cockpit Halves: Carefully align the two halves of the cockpit so the internal supports and slots match up. Gently press the halves together. The edges should align seamlessly, and the nose part should slot in without forcing. If there's resistance, check for any misalignment or excess material that might need to be filed or sanded away. Attach the Cockpit to the Main Body: Once the cockpit is fully assembled, position it over the main body. There should be a clear front and back to the cockpit, with the narrower end pointing forward. Align the cockpit attachment points with the corresponding areas on the main body. Press down firmly to snap the cockpit into place. If it doesn't fit ea