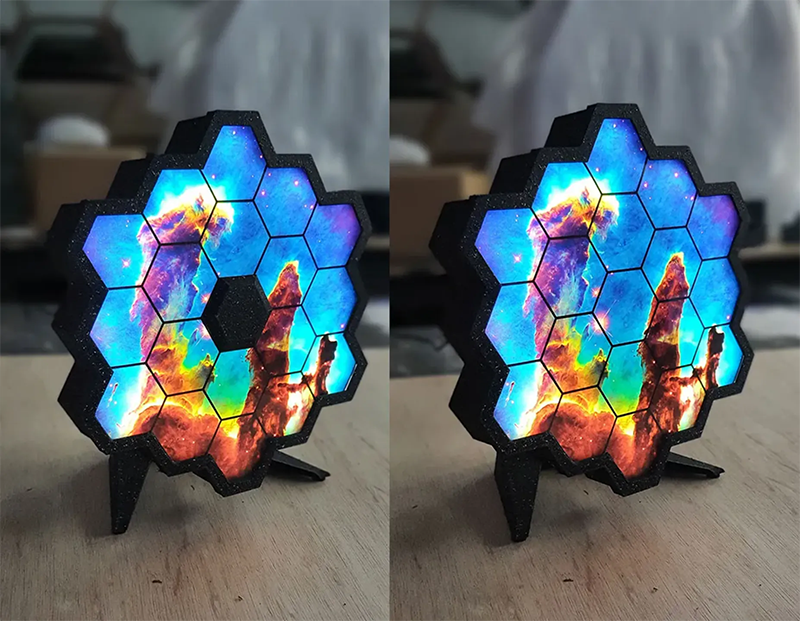
About this 3D model
Boost Me Thanks for the support! A simple lightbox made into the JWST mirror shape with a backlit print illuminated by LEDs. Everything can be printed with no supports. Prints great at .2mm layer height. If you shrink the file, the LED plug hole will be the only thing that wont work and you will need to drill it larger. It is around 11"x9"x5" when finished and on its stand. Rough Instructions. Parts needed: (6) ¼" screws(or close). This is for the top ring. (3) 1" screws(or close). This is to connect the stand. (2) pieces of 0.093"/2.4mm acrylic. You can purchase any size as long as you can get (2) 10" circles. https://www.homedepot.com/p/OPTIX-11-in-x-14-in-x-093-in-Acrylic-Sheet-MC-27/202090111 (1) LED light strip. Most of the brands are the same thing so you can shop around if you want a remote/dimmer..etc. amazon.com/gp/product/B07DS2DDBM (1) Backlit print. The print needs to be a really high quality image printed onto "Backlit Film". I get mine from PosterPrintShop.com . The shape needs to be printed at 9.5" x 8.75", this will give you just enough extra to trim to fit. JWST Images - https://www.webbtelescope.org/images You will also need a jigsaw with a high tooth count metal cutting blade.(cuts acrylic easy) Place the LED plug into the inside hole of your base piece and glue it in. Now make 2 full loops with the LED around the inside edge of the base piece. Keep the lights as low as you can. Trim on the marked area on the led rope. I recommend adding a few drops of hotglue over the led rope as the adhesive is usually a hit or miss. Use the “cut guide” to mark your acrylic sheet for cutting. Use an orbital sander to fine tune the edges to fit inside the lip on the base. You will need to make 2 of these. Use the acrylic to mark your backlit print with a razorblade and cut it out. The print should be a touch oversized so you can trim to fit. The top ring hides the edges, so dont worry about it being perfect. Be careful to not scratch the print, they are very delicate. Attach the stand to the base using (3) 1" screws. You may need to predrill if the holes are to tight. Place one piece of acrylic in the base, then the backlit picture, then cover with the 2nd piece of acrylic. Finally, place the ring on top and secure with 6 small screws. You will need to predrill with the ring to guide you. Place the NASA backplate over the 3 screws on the stand to hide them. You should never have to separate it, so you can either glue or screw it after everything is tested. Optional: Place double sided tape on the back of your middle hex's and stick them to the acrylic. This may block off too much of the galaxy for some, but it looks great either way. If everything is good after this I recommend taking it apart and spraying it with a “stone texture” spray to hide the 3d printing lines. The granite one(pictured) looks a lot like stars.