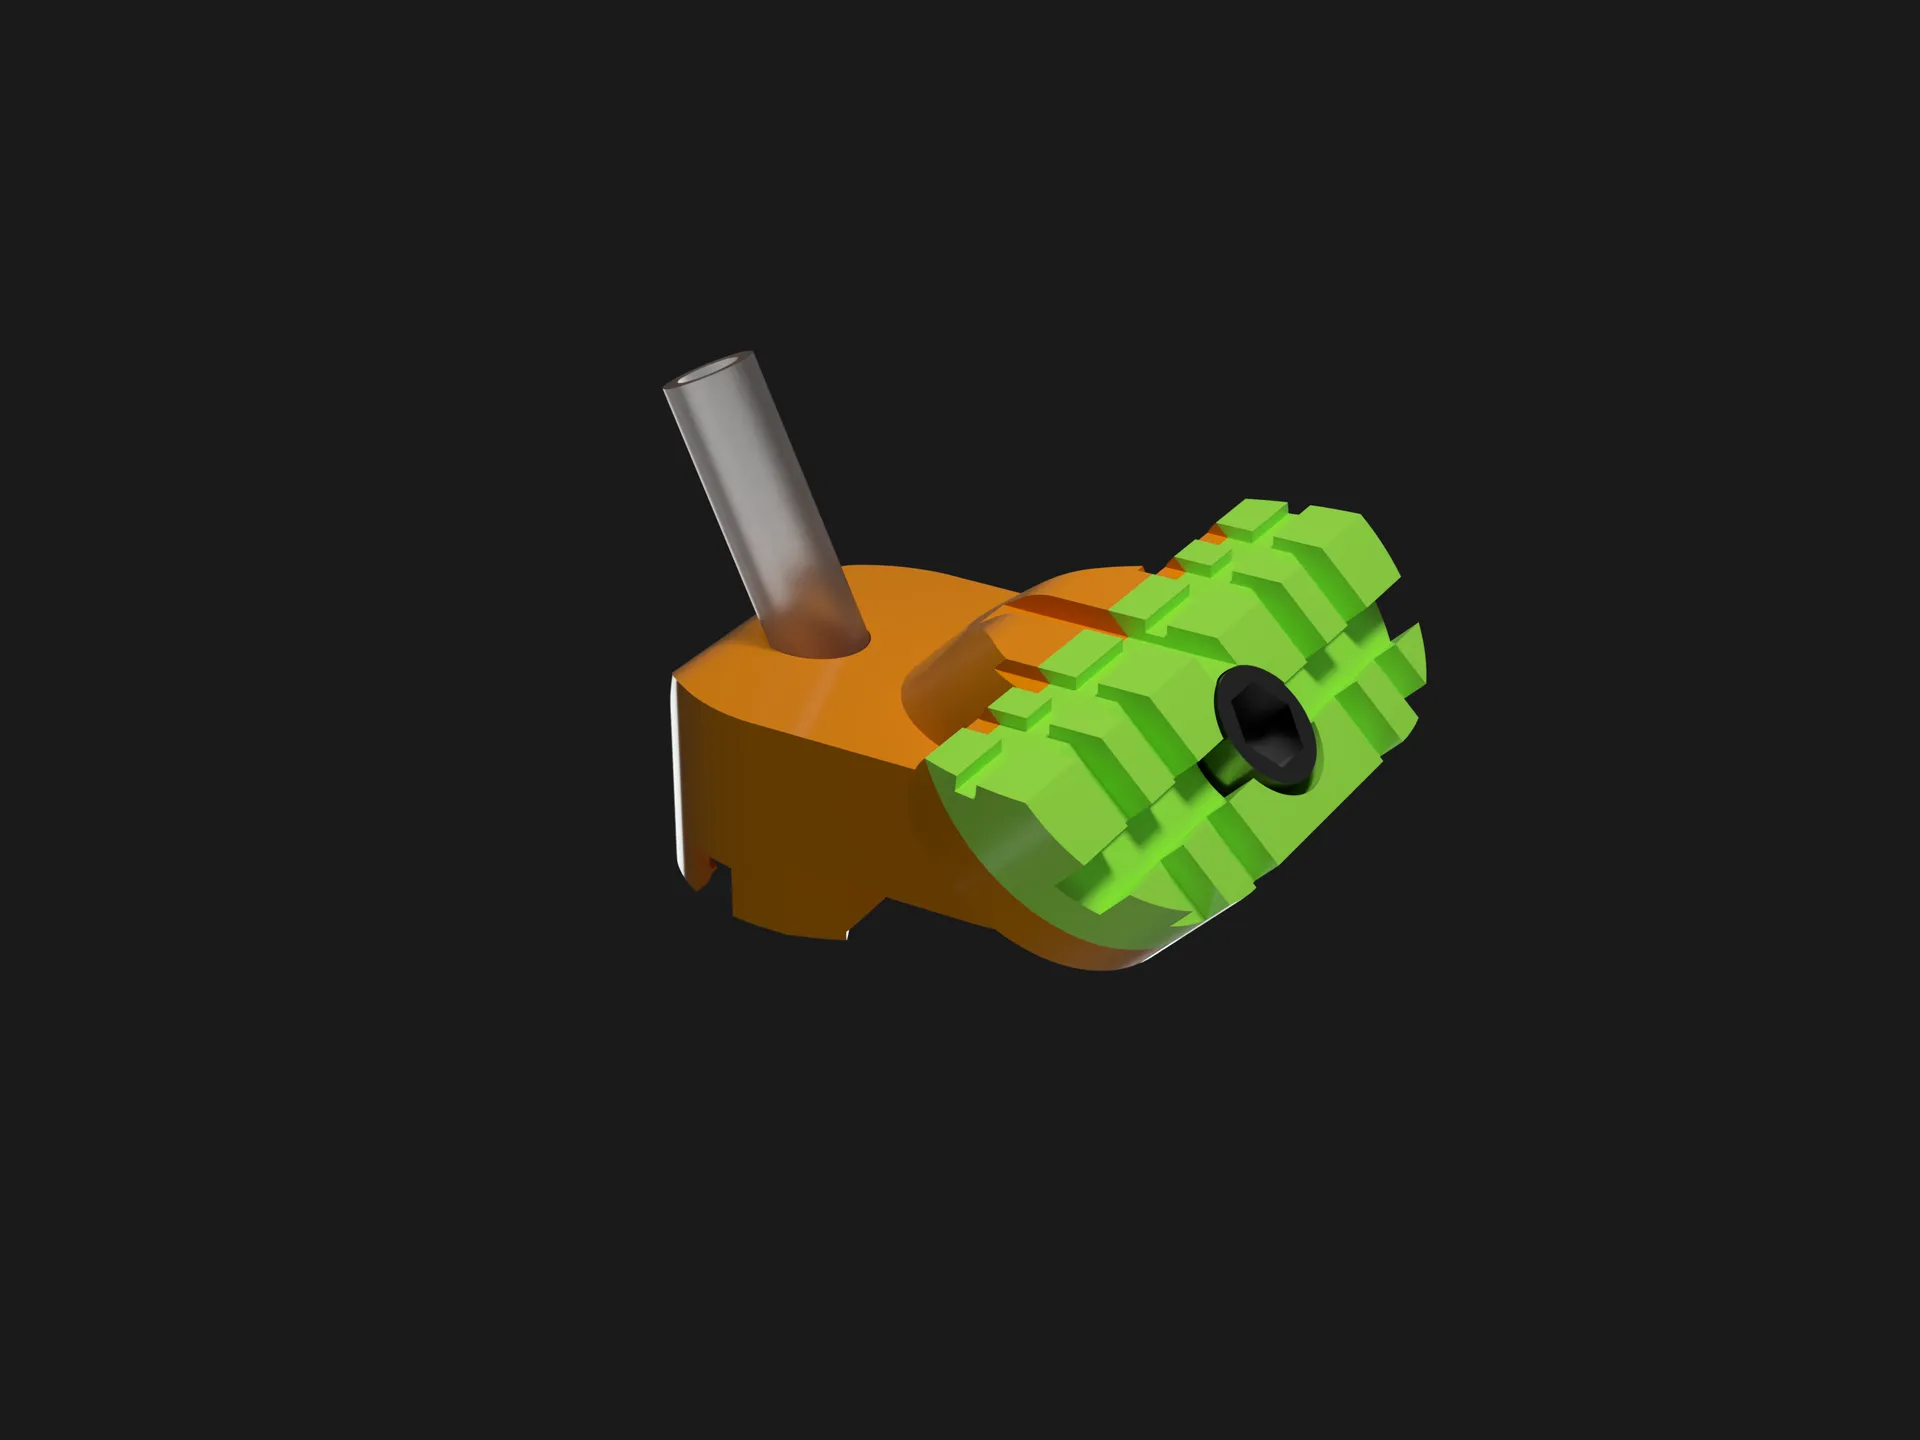
About this 3D model
The SENATE - amS feedEr buttoN And proTEctor for Bambu AMS System Look at me mom, I used another stupid acronym. I was not happy with all the AMS Feeder Protector Button things out there, they all had flaws and strengths, including my own previous design . This is my attempt at drawing inspiration from the other AMS Feeder Buttons out there and combining all of their strengths. Inspiration is mostly taken from: Bambu AMS Feeder Button by Warpster - I liked how this one snapped on tightly and stayed on. Hydra AMS PTFE Load Buttons by Humebeam - I like how this one had the larger, wider buttons that are easier to push. My own previous design - I incorporated an angled hole for the PTFE tube in that design, and it carries on to The SENATE. Benefits of using The SENATE: Protect your AMS Feeders from wearing out, and they will, especially if you use any materials in the AMS that are even slightly abrasive. Easier to load filament into the AMS feeders due to the angled design, larger button, and superior grip texture. What's unique to The SENATE? Angled hole for PTFE tube to point it more towards the spool. Narrower front bevel to accommodate full spools. Larger (wider) button, easier to push. Optional and unique add-on grip surface, screws on with a single M3x4 socket-head screw . Grip cover can be printed in a different color than the main body for a multicolor look, or in TPU for an even grippier surface. I don't think grippier is a word? Printing instructions: Load models into Bambu Studio or OrcaSlicer. Click auto-orient and auto-arrange buttons. Duplicate the models so you have a total of 4 of each. Print at 0.16 mm layer height. No supports should be needed. I recommended PETG, ABS, or ASA. I have previously printed AMS buttons in PLA, and they eventually wore out and started slipping off. You can try TPU for the grip cover! I bet that would work nicely? NOTE: To test fit, I would recommend first just printing one and then decide if you need to modify flow rate. Installation instructions: You may need to take a razor knife and clean up the inside of the hole for the PTFE tube a little bit, filament tends to sag in here as it's printing depending on the filament and temperatures. If you printed the optional grip covers, you can screw them directly onto each of the main buttons using a M3x4 socket-head screw . You will be making your own threads as you screw them in, so it may be very hard to screw them in depending on the plastic you use. You want to screw these down very snug, so the grip cover doesn't spin around. Optionally, if you do not have the screws, you can superglue the grip covers on and let dry for about 1 hour. Snap each of The SENATE onto your gray-colored AMS feeder buttons. They are specifically designed to be a TIGHT fit, so they stay on. For the easiest installation, you should push the gray button forward, tilt them sideways at an angle to “hook” the underside beveled edge onto one side of the gray AMS feeders, and then snap the other side down and on. It is a bit tricky, but you should get a feel for it. Do not force anything too hard, but you will need to use a little bit of force. Cut four PTFE tubes (4mm OD) to about 20mm in length to stick into each of The SENATE. These are designed to fit the BambuLab tubes snugly and will be a very tight fit, but you should be able to get them in if your extrusion calibration is correct. If you are using another brand PTFE tube, the fit may be more snug or loose. You can try increasing or decreasing flow rate in the slicing program by about 1-3% if your test print does not fit well. TIP: Push them in with a solid, flat object at the top of the tube while holding the tube with your other hand - and remember, they go in at an angle, not straight-in. FAQ: Q: Do you need to use the PTFE tubes? A: No, but it helps prevent wear from abrasive filaments on The SENATE and helps the filament guide through it a little bit more smoothly. You should cut the PTFE tubes about 20mm in length or shorter, any longer and they might touch a full spool and bind up. Q: What screw size do I need to attach the grip covers? A: M3x5mm for v1, M3x4mm for v2 , these are socket-head metric screws, but you may be able to use other types of screws of similar length. You can also superglue the grip covers on if you wish. Q: What material should I print these in? A: For the main body, I recommend a durable filament such as PETG, ABS, ASA, Nylon, PC, etc. You can probably use PLA, but it may wear out quicker. For the grip cover, you can use anything you want, I might even suggest TPU. Q: It's way too tight and can't get it on, or too loose and falls off. A: You want it to be very snug. I recommend tilting it and “rocking” it on from the front to the back or side to side (there's a lip under the main object that snaps underneath the gray funnel). If you still can't get it on, you need to decrease your flow rate in the slicing software 3-5%. If it's too loose and falls off, or the PT