About this 3D model
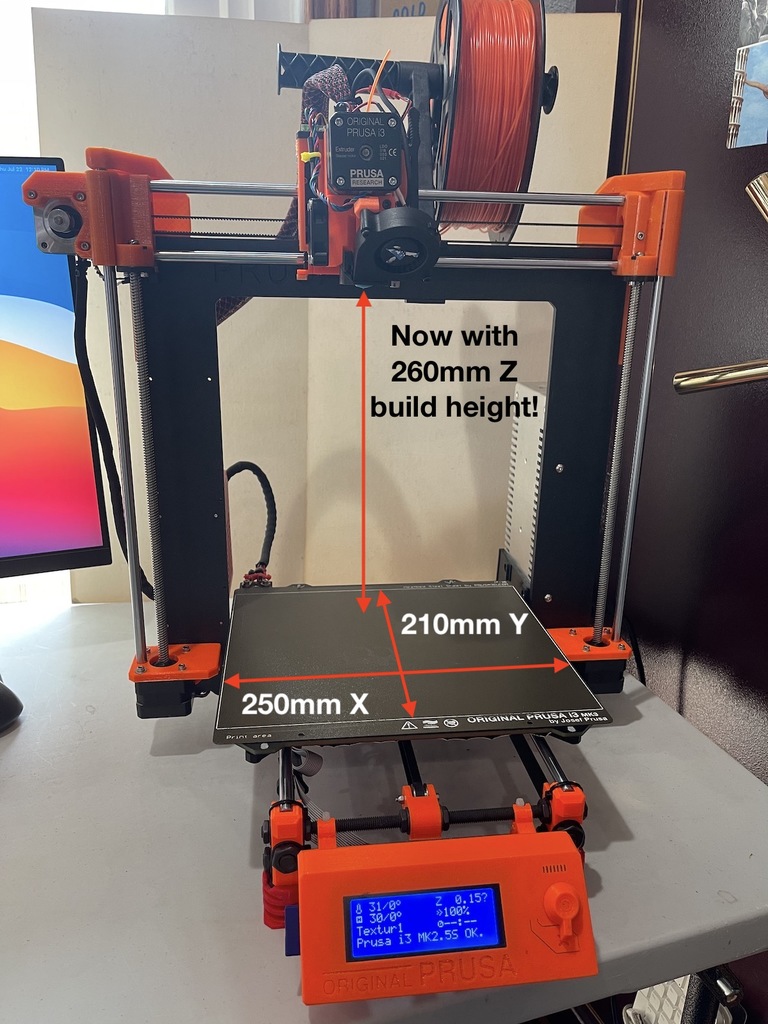
The content is too long and has been truncated Update Your Prusa MK2.5S with a Wham Bam Mutant V2 Universal Toolchanger! And Get an Extra 50mm Z Axis Build Height FREE* (see Bonus Option below) __A separate version of this project for the Prusa MK3.5S+ is in development, a link to it will be placed here when it is posted to Thingiverse.__ Learn more about the Mutant here: https://whambamsystems.com/mutant Welcome to the Mutant Invasion! These parts are used to modify the Prusa MK2.5S to be compatible with the Mutant universal tool swapping system and to mount the Wham Bam Mutant onto Prusa MK2.5S X gantry. This project ensures that you do not lose any build space on your Prusa MK2.5S. A separate project for the Prusa MK3, Mk3.5, and MK3.5S+ is being finalized. A link will be posted here when it is ready. This project's X gantry hotend assembly parts are also compatible with the Wanhao i3, and other 3D printers where the X gantry is based on 45mm center-to-center dual Linear Motion Rods. Instructions on how to modify your hotend assembly wiring loom to connect to the Mutant V2 can be found here: Note for this modification you will likely need to extend (or replace) the wires in the loom as its path now goes over the top of the Prusa Z axis frame. In order to reach to the bed over the top of the Z axis frame you will need 600mm of wire length as measured from the top of the Prusa controller box to the top of the Mutant base plate connectors. If you are going to extend your existing wire loom, here are two options: • You can purchase (or build your own) extension cables for each component in the hotend assembly. These connect on the controller board side of the wire loom. Here is a source where you can purchase the cable extensions: https://caribou3d.com/en/17-plugs-connectors-cables • You can solder wire to the existing loom to reach the Mutant base plate connectors. I recommend these easy to use soldered connectors (only need a heat gun) to ensure a strong long lasting connection. https://www.amazon.com/gp/product/B083LZS69N Be sure to use the same size and type of wire for each hotend component powered via the wire loom. If you are going to build a replacement wire loom, I would recommend a length of 750mm to run from the controller board connectors to the Mutant base plate connectors. Minimum printed parts required to add the Mutant to a Prusa MK2.5S (recommend printing in PETG, ABS, or PC). • Prusa Syle Mutant X Gantry Plate.stl • MK2.5S-X-end-motor-M.stl (to adjust the end-stop switch position for the Prusa OEM extruder/hot-end setup PLUS • MK2.5S-Short X EndStop.stl (Prusa OEM extruder/hot-end setup) OR • X Endstop Prusa MK2X Series.stl (adjustable for other hot-end setups) This project supports two styles of X end-stop brackets. One for the Prusa MK2.5S extruder/hotend assembly, and another for other hot-ends/devices you may want to use with the Mutant on your Prusa. This Mutant mount will not lose any Z Axis build volume. If you ONLY use the part(s) above, since the Mutant is wider and thicker than the OEM setups for the Prusa Style printers, 28mm of X Axis build space is lost. Resulting in a 220mm X by 195mm Y build space. While no firmware changes are needed for the above, without completing the full mod set below, you will not be able to perform a Calibration > Wizard setup (not normally needed after passing the first time) as the Pinda probe will not find the targets. To have full build volume and full software functionality, complete the rest of the mods below. Restore full Prusa build volume for X & Y: Purchase two 8mm x 400mm Hardened Chrome Plated Linear Motion Rods https://www.amazon.com/gp/product/B07DPGD69D Print the included replacements for the Prusa Z Axis bottom and top STLs. These will move the X Axis ends out by 15mm on each side compensating for the wider Mutant gantry to restore the full 250mm X axis print space. (see photos) • z-axis-top-v2.stl • z-axis-bottom.stl • Prusa Mk2.5S Power Supply Bracket.stl • 8mm x 400mm Hardened Chrome Plated Linear Motion Rods - https://www.amazon.com/gp/product/B07DPGD69D Since the addition of the Mutant adds ~15mm to the front of the X gantry (which would otherwise be a loss of ~15mm on the Y axis), so in order to correct for this, all that is needed is to reposition the Z frame on the two Y axis threaded rods back by the equivalent ~15mm. The reason this is approximate is that your distance from the X gantry rods to the hot-end nozzle may vary in your setup (depending on the hot-end setup you use). When mounting the Prusa extruder and hot-end with the modified parts included here, the offset distance is 15mm. Start by removing the screws that hold the power supply to the bracket on the Y axis. Next loosen the two sets of double nuts that hold the Z frame to the Y axis threaded rods (see photos for details). Reposition the Z frame on the rods back by 15mm. Measure accurately and then tighten the nuts to hold the Z frame in place. Note that due to t