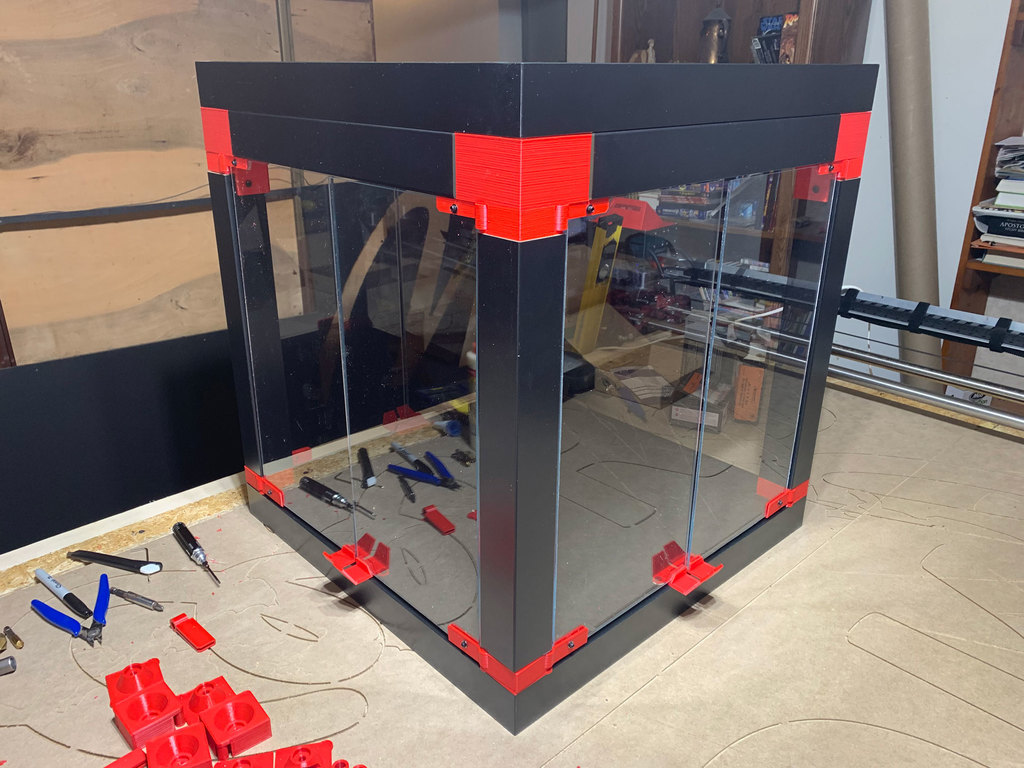
About this 3D model
Heads up! This is v1. A new, improved "v2" is NOW AVAILABLE! A new, improved "v2" of this enclsoure has been developed. Get it here: https://makerworld.com/en/models/219567 If you're planning to make this, check out the discussion in comments linked right here: https://www.thingiverse.com/thing:5137500/comments#comment-6269801 I am a big fan of the BIQU B1. Of the seven 3D printers I currently own, four are B1's, and I have a BIQU B1 SE Plus on order. As you may know, a B1 is too tall to fit in the Prusa designed IKEA Lack enclosure (version 1) and their version 2 (which needs more height / headroom because of their multi-material add-on) costs a whopping 200 hours of print time because they decided to gain the extra headroom by printing plastic. I thought, "The IKEA Lack tables are only $9.99. I'll use an extra set of legs (turned side ways) to get the extra height." In short, it works, and the resulting enclosure holds a BIQU B1 nicely! One minor caveat: just as many using the Prusa enclosure have had to print a new design of "heater bed wire strain relief part" with a 90 degree bend, in order to keep the heater bed wires from bumping the back pane of acrylic, this design also calls for that, and the good news is that my remix here already includes a part custom designed just for the BIQU B1. It's a drop-in replacement. Just use three zip ties to secure your heater bed wiring into the new part. So, without further ado, here is... DIY Lack table enclosure for BIQU B1 PARTS FOR PRINTING Just as with the Prusa design, most of the printed parts are organized into sheets of multiple parts that are all designed to fit on the print bed of a BIQU B1. Those sheets are: Bottom-Corners.stl Door-Knob-(x3)-and-Cable-Clips-(x10).stl Top-Corners.stl Top-Extenders.stl Additional parts that are not ganged up on a sheet with others: BIQU-B1-ac-heater-wire-redirect-strain-relief-bracket.stl (The main reason the strain relief part is by itself, is so you can more easily print it in PETG, which I did, and advise you do, because of its exposure to heat from the print bed.) ASSEMBLY TIPS At the head of each corner, one "Top-Extender" is to sit above one "Top-Corner" — and be careful to insert your hinge into the "Top-Corner" before you snap that little assembly together and bolt it to the underside of the Lack table's top, using a big #12 lag screw (4" length). This is all done first, while the top of the enclosure in face down on your assembly area. Once the upside-down table top has all four corner assemblies bolted on, you should be able to attach not only the four vertical table legs, but also the four legs that get inserted horizontally (to gain the extra headroom needed for a B1). I recommend inserting the horizontal legs first. This is designed for a snug fit, so have a rubber mallet on hand in case a few love taps are needed. Use screws vertically to attach the horizontally used legs to the table top, and use screws to attach them to the corner assemblies. I used some common black drywall screws (of various appropriate lengths) to do this. I used the same kind of screws to attach the vertically used legs to the top corner assemblies. Re. your 3mm (1/8") thick plexiglass panes, which are to be sized/cut exactly as with the Prusa version 1 Lack table (440mm x 440mm for any solid panes with no door, and two 220 mm x 440 mm panes for where doors are called for), the usual and advisable practice is to insert your plexiglass panes before tightening down your bottom corners. Speaking of bottom corners: Since the BIQU B1's AC power cord is apparently thicker than on a Prusa, I tweaked the Prusa-designed cable opening in the one special "Bottom-Corner" by enlarging it. My goal for the modified opening was to accommodate LED wires in addition to the thick AC power cord. HARDWARE NOTE Four long screws are called for, longer than any used in the Prusa design, because of accommodating the additional headroom. These need to be 4" long (#12 size in diameter). An affordable way to source what you need is to buy lag screws from your local hardware / home improvement store. My design enlarged and deepened the "countersink" opening in the printed plastic part so that not only can the thicker hex head of a lag screw be fully countersunk, but also a socket head should fit in there around it to ratchet tighten the hex screw down. THE BETTER TO SEE YOU WITH - L.E.D. NOTES Among the advantages of using the additional set of table legs to gain the needed extra headroom, is that those legs provide a great place to attach LED lights. I like this placement better than on the underside of the top, because a continuous strip of lights can be installed without having to cut it into separate pieces (that would then need re-wired to stay attached to each other). So, here are several tips about LEDs: If you have leftovers from some prior install of an LED strip of the kind that accepted color change commands from a controller with remote, and you just h