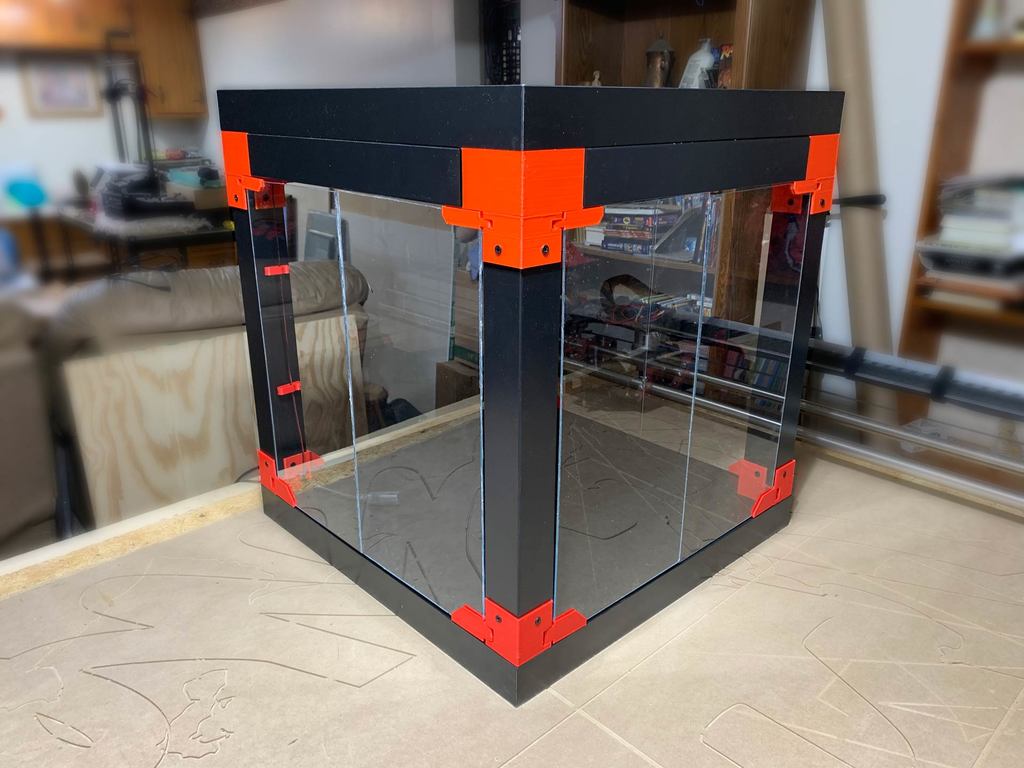
About this 3D model
Heads up! This is the new, improved "v2" enclosure... If you were looking for the very popular, original "v1" enclosure, it's still available over here: https://makerworld.com/en/models/217908 I created a fantastic ILLUSTRATED TUTORIAL - ASSEMBLY GUIDE for this DIY enclosure, downloadable for only $2.99 at https://design8studio.com/downloads/ Please consider springing for the $3 in order to buy me a cookie in thanks, and get the illustrated assembly guide, gaining the easiest and best setup process for your enclosure! If you prefer not to, then you can still do things for free - see below. . . . If you're planning to make this, you can get a quick understanding of the reasons for a v2, and the differences it offers when compared to the v1, by reading the copy-and-paste (below) of a discussion from the comments on v1 — linked here: https://www.thingiverse.com/thing:5137500/comments#comment-6269801 Note: In the pic that shows my four enclosures, the lower two are Version 1, and the upper two are Version 2. Why v2? OK, so pretty much everyone who makes the original Prusa-designed enclosure comments that it's wobbly, not stable, not as sturdy as they were expecting. I went into my v1 remix realizing that was a price of having an option to lift the whole thing off its base whenever needed. The "pro" is the opening. The "con" is the instability. But what if the door opening is big enough to slide a BIQU B1 in and out as needed, without lifting up the enclosure off its base? Well, with my design here, the opening is big enough, and the base can indeed be solidly "fixed" to the top, and thus you can gain the sturdiness that offers. Insertion of a B1 is as simple as leaning it back, sliding in, and then standing it up. Q&A Q: What is the inside height from floor to ceiling? A: Between 496 - 497 mm. Q: What is the doorway width (max opening)? A: Between 444 - 445mm. SOME DETAILS I am a big fan of the BIQU B1. Of the seven 3D printers I currently own, four are B1's, and I have a BIQU B1 SE Plus on order. As you may know, a B1 is too tall to fit in the Prusa designed IKEA Lack enclosure (version 1) and their version 2 (which needs more height / headroom because of their multi-material add-on) costs a whopping 200 hours of print time because they decided to gain the extra headroom by printing plastic. I thought, "The IKEA Lack tables are only $9.99. I'll use an extra set of legs (turned side ways) to get the extra height." In short, it works, and the resulting enclosure holds a BIQU B1 nicely! One minor caveat: just as many using the Prusa enclosure have had to print a new design of "heater bed wire strain relief part" with a 90 degree bend, in order to keep the heater bed wires from bumping the back pane of acrylic, this design also calls for that, and the good news is that my remix here already includes a part custom designed just for the BIQU B1. It's a drop-in replacement. Just use three zip ties to secure your heater bed wiring into the new part. So, without further ado, here is... VERSION 2 - DIY Lack table enclosure for BIQU B1 PARTS FOR PRINTING This revision requires supports being turned on with the "bottom corners" sheet and the "top corners" sheet! No fiddly settings. Just switch on "Supports" in Cura or whichever slicer you have. I like Cura's tree supports! They are easier to remove! Just as with the Prusa design, most of the printed parts are organized into sheets of multiple parts that are all designed to fit on the print bed of a BIQU B1. Those sheets are: • Bottom Corners and Back Bushings.stl • Top-Corners.stl • Top-Extenders.stl • Door-Knob-(x3)-and-Cable-Clips-(x10).stl Additional parts that are not ganged up on a sheet with others: • BIQU-B1-ac-heater-wire-redirect-strain-relief-bracket.stl The main reason the strain relief part is by itself is so you can more easily print it in PETG, which I did and advise you do, because of its exposure to heat from the print bed. PLA might be fine, but you have trouble with deforming, upgrade to PETG. Note on the "Back Bushings" — you're probably wondering what those are... My design allows the one solid side (without doors) to be either in back or on either the left or the right side. Depending on where you place that panel, you might need your "ac power cord hole" on one side or the other. So, this design provides "AC power cord holes" on both sides. The parts list includes two plugs to fill those two holes (plugs that Prusa calls "bushings," so I am too). They can be clamped around the already-inserted AC power cord, and slid in place. The side without a power cord will have a hole in the plug unless you plug the hole. (These are the jokes, people.) Note on “door handles and doorstops” — Although Prusa’s V2 design seems to not have their V1 door handles and doorstops in the middle where the doors meet, I'm leaving my V1 part sheet (with those on it), in case you want door handles, or in case the doors don't seem to stop in exactly the right place and you deci