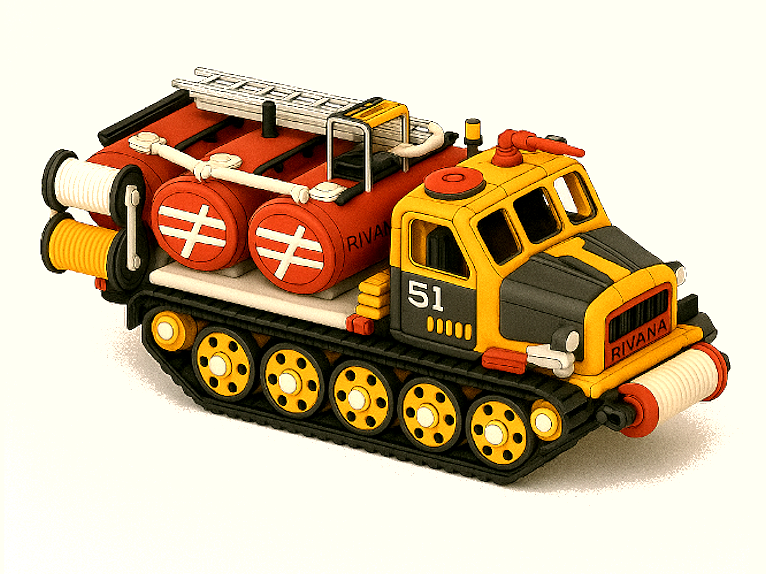
About this 3D model
This is an old school type of fire engine based on the Yellow Artillery Tractor Chassis model that I have released earlier. In that release itself I have explained how it is the universal platform on which various payloads can be added for specific function. This release contains the fire engine payload of the same. I am very thankful to Mr Benoît Lussier for his feedbacks which has helped me refine the model further. Please Click Here to check out his make If you have already downloaded and printed Yellow Artillery Tractor Chassis model, You would only need "Yellow AT Fire Truck Payload.3mf" file and Please skip to the title ASSEMBLY OF PAYLOAD. There are three ways to print this. As single piece :- Please download STL file but there wont be any movements. Multiple Pieces :- Download 3mf file with Full_dismantled.3mf. BEST QUALITY OUTPUT . Please use the 3mf file for assembly also. CHECK EASE OF PRINTING TITLE BELOW Combined :- You may use any 3D viewer software like 3D builder in windows to merge components according to your printer and filaments. The sky is the limit for this. You may find a sample file ending with combined.3mf. If you want to try TPU for tracks, you can download the "AT FireTruck TPU Tracks" which has the tracks and gears. You will need to replace all the gears and pinions in PLA version with the provided gear for TPU track working. but please note that I haven't tested them. ASSEMBLY OF CHASSIS ASSEMBLY OF PAYLOAD Follow the GIF for assembly of payload. MATING WITH CHASSIS Follow the GIF for mating of payload with truck chassis. You can reuse the nut and bolt securing the Bed in the Yellow Artillery Tractor Chassis model to secure the payload. But you have to glue the nuts to the payload bed as shown in instructions. Movements Included Engine Bay Cover Swing Open NOTE The tolerances to some elements are zero which has been intentionally provided to friction lock the elements while not in movements. You may have to fine tune the tolerance from your end using scaling function in slicer to ensure good fit without compromising movements. This also applies for the pins that make rotation possible between elements. Please proceed with printing all the pins after testing printing a pin and testing the fit of a joint. You should be able to find the adequate scaling factor with this. Appreciate the makes uploads. Open for suggestions.