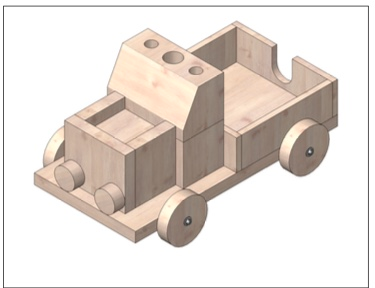
About this 3D model
Notizexpress The template for this project was a wooden construction kit that I use at school in craft lessons. With this kit, you can make a functional and attractive desk set in the shape of a truck with simple means. There is plenty of scope for the individual design of the vehicle, so that you can also realize your own ideas. This kit is ideal for your own desk, as a gift (as a kit or fully assembled) or as a craft project with your own children, grandchildren etc. ... Note express The template for this project was a wooden construction kit that I use at school in craft lessons. With this kit, you can make a functional and attractive desk set in the shape of a truck with simple means. There is plenty of scope for the individual design of the vehicle, so that you can also realize your own ideas. This kit is ideal for your own desk, as a gift (as a kit or fully assembled) or as a craft project with your own children, grandchildren etc. ... Construction Instructions Notizexpress Tools / Materials Required: Super Glue Pencil / Sharpie Ruler Step 1: Glue the parts 2a + 2b as shown above as sideboards to the base- plate (1) flush with the rear edge. Attention: If you print the files with an A1 mini, please glue the two plates (base plate has been cut) of print plate 1 together first! ( Attention: If you print the files with an A1 mini, please glue the two plates (base plate has been cut) of print plate 1 together first!) Step 2: Glue the two parts (3a + 3b) on top of each other as shown. Step 3: Glue the finished cab centered flush with the loading bed onto the base plate (1). Step 4: Glue the two parts 4a as shown from both sides flush with the under- side edge of the cube (3c). Glue part 4c on from the front. Step 5: Glue the engine block as shown on the base plate flush with the cab. Step 6: Attach the wheels with a distance of 4 cm from the rear and front edge to the base plate. Step 7: Glue the two headlights (6) onto the engine block from the front. Done!