About this 3D model
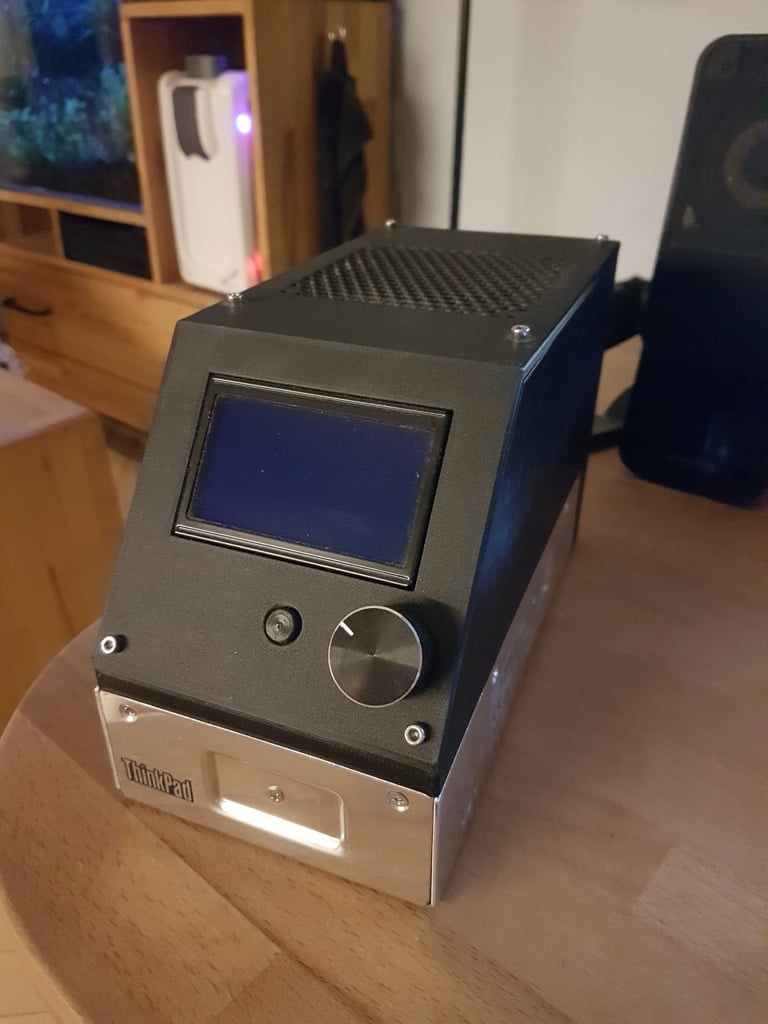
This is the main part of this build. Control box has connectors so it can be recofigured as the printer is upgraded or simply unplugged for an easy transportation. First things first. Base is an original ender 3 power supply. Ive ditched the Melzi board since it died anyway ill be using GT2560 instead. I probably wont make versions for other boards. Ive lost all off my original files due to a ransomware attack and only files left are these two STLs, because they were safe on my octoprint server. Im using usb cables for stepper motor wiring because theyre easy to get, shielded, have enough wires and you cant plug them the wrong way. Also its only half the soldering. Instructions: 1.Print both parts ---Main body--- Disassemble the power supply and remove the fan (everything will be cooled by one fan on top) Mount GT2560 and Raspberry pi (optional). Raspberry can be powered from GT2560. 5V pin is marked on the board (next to cpu). Connect both with A-B cable. Cut the male end from all the extension cords and strip down the rubber around female part. Leave enough rubber so the cable can fit snuggly through a hole but not all of it so it wont wobble inside. Secure them with CA glue. You can solder the other end directly to the board or you can use connectors (dealers choice). Same goes for the power connector. Solder wires to all of the DC099 connectors. Screw them inside (should be enough but little bit of CA or hot glue never hurts) and solder/plug them to the boards Solder 92x92x25 fan to FAN 3 header ---Top cover--- (optional) Desolder sd cart slot from lcd assembly and solder spring-loaded one instead. Its going to make your life so much easier. Go to https://www.thingiverse.com/thing:2813298 and download and print parts: Bottom_Shell.stl, Reset_Knob.stl and Display_Support_Frame.stl. Assemble everything lcd related. Mount the fan and put together the rest. Should be easy enough. Now you are done and ready for the next upgrade. Dual extruder. Stay tuned. Dont forget to show some love to the original makers of models ive used. This is part of a bigger project i call Neverender. My goal is to make Ender 3 as good as possible without throwing it away, buying a Prusa and calling it a day. Print Settings Printer brand: Creality Printer: Ender 3 Rafts: No Supports: Yes Resolution: 0.2 Filament brand: Gembird Filament color: black Filament material: PLA Notes: See pictures above for more info about printing orientation and support placement. Parts List 1x Geeetech GT2560 board 1x Raspberry pi 3 (optional - for Octoprint) 1x 12864 LCD Control Panel (the red one) 1x Spring-loaded SD card slot (optional) 1x 92x92x25 12V fan (with self tapping screws) 6x Nut M3 6x Bolt M3x9 9x Usb extension cable 1x Usb A-B cable 16x DC099 5.5 mm x 2.1mm Female connector Connector labels X/Y/Z1/Z2 - Stepper motor for X/Y/Z axis E1/E2 - Extruder 1/2 BLT - BLtouch PIE - Raspberry Usb port PWM - PWM 12V (for nozzle cooling fan) FAN1/2/3 - 12V (can be used for cooling fans or LEDs) MIN/MAX X,Y,Z - Endstops X/Y/Z HOT1/2 - Hotend 1/2 BED - Bed heater TH1/2/B - Thermal probe 1/2/bed