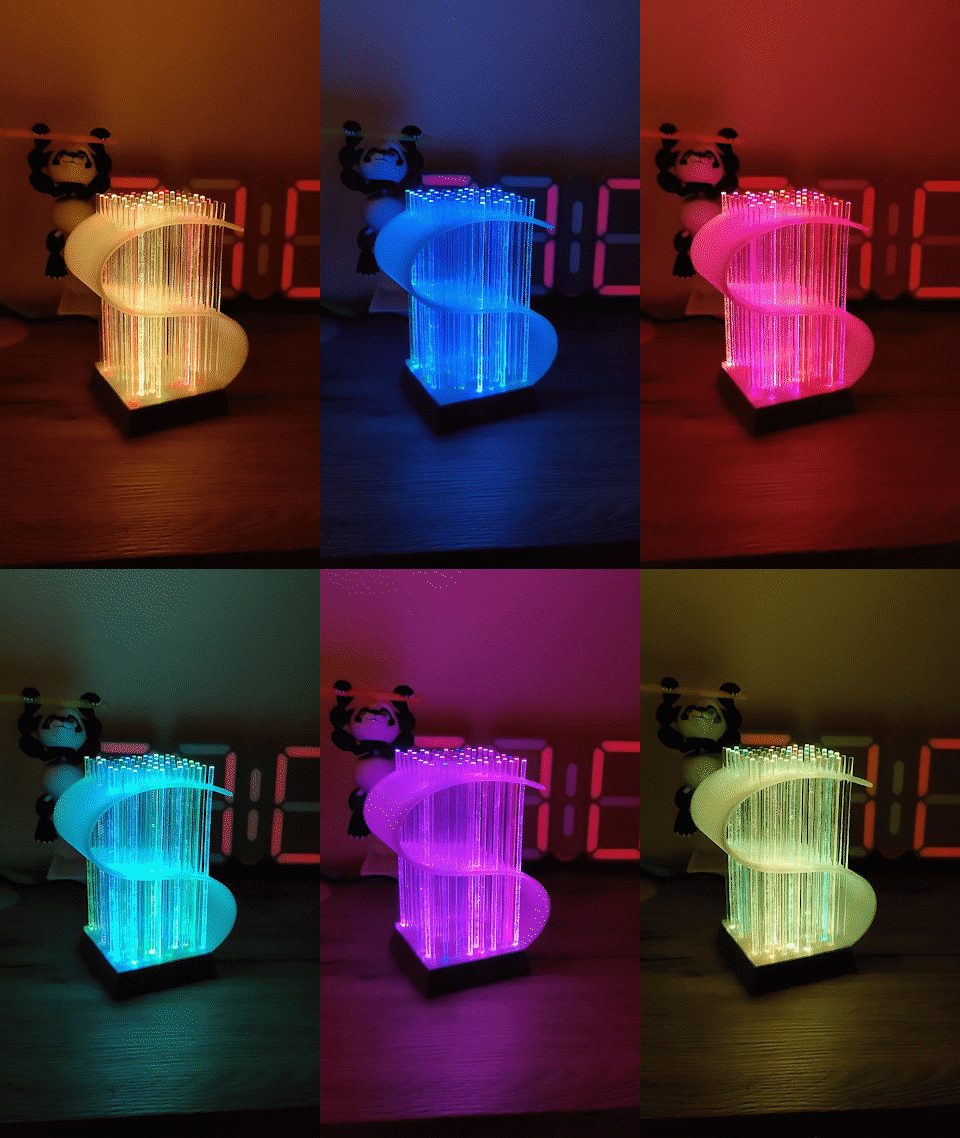
About this 3D model
$lamp Lamp w. touch function This is a project I had in mind for a while I wanted for my office like a zen garden sort of thing. The design is meant to be soft on the eyes with different light options. It is designed to be easy to print and assemble, with no screws or glue required. The only bit you can't get around is a bit of soldering. I wrote up a guide to make this possible for every one to make with no special skills required. The free version comes with 1 color scheme, If you are interested in the commercial license or just want to show support for our work, the 10 color scheme model, buy it here Happy Printing! Parts: Arduino Nano TTP223 touch sensor USB cable 64 x Acrylic lollipop sticks (15cm/6") 8x8 WS2812 LED matrix Tools: Soldering Iron. Drill (3mm/0.12" sorry European :P) Computer to upload code to arduino. Arduino IDE software (can be found in Windows store) 3d printed parts: Frame_body Bottom_body LED_body Clamp_body S Frame Assembly: Soldering Solder a wire going from 5v on the arduino to the 5v on the LED matrix and VCC on the touch sensor. IMPORTANT! Double check you are using the DIN direction of the Matrix. Then add a wire going from GND on Arduino to GND on both LED and Touch sensor. Last you need to add the digital signals. One going from DIN on LED to PIN D2 on the arduino and another going from the I/O pin on the touch sensor to PIN D3 on the arduino. And that's it! Picture shows where wires go. Lamp Frame The S Frame will need some drilling to make sure the rods go in perfectly. After that is done, start inserting the rods into the S frame from the bottom of the frame. Align the rods in the bottom so you have around 3-4 mm poking out from the S frame . Then you can attach the LED_body to the bottom of the S frame . Use a table or any solid plane surface and put the S frame upside down so the acrylic rods are resting on the surface. Do the last adjustments to the acrylic rods so they are aligned with the bottom of the S frame and then press on the LED_body using the surface. Now you should have the S frame ready to attach to the frame_body of the lamp. Add the Arduino to the Bottom_body and attach the Clamp_body and use double sticking tape to attach the touch sensor to the front of the frame. Then put the matrix on top of the Bottom_body . Insert Bottom_body from underneath into the Frame_body. Take the base of the lamp and attach it to the top, make sure you have the base aligned since is function as support for the LEDs. Programming Attach the arduino to your computer using a USB and load up the arduino IDE. Go to tools > port and find the right com port your arduino is connected to (usual it's the first you see) and select it. Copy and paste the code from underneath into the program and save it. Press upload. After code is uploaded the LEDs should start flickering. Touch button should turn off LEDs. // Code written by Madtrap using fastled lib // It is written to fit the Slamp Lamp project // contact: https://makerworld.com/en/u/150513043 #include < FastLED.h > FASTLED_USING_NAMESPACE #define BUTTON_PIN 3 #define DATA_PIN 2 //#define CLK_PIN 4 #define LED_TYPE WS2812B #define COLOR_ORDER GRB #define NUM_LEDS 64 CRGB leds [ NUM_LEDS ]; #define BRIGHTNESS 96 #define FRAMES_PER_SECOND 120 void setup () { pinMode ( BUTTON_PIN , INPUT ); delay ( 3000 ); // 3 second delay for recovery // tell FastLED about the LED strip configuration FastLED . addLeds < LED_TYPE , DATA_PIN , COLOR_ORDER >( leds , NUM_LEDS ). setCorrection ( TypicalLEDStrip ); //FastLED.addLeds(leds, NUM_LEDS).setCorrection(TypicalLEDStrip); // set master brightness control FastLED . setBrightness ( BRIGHTNESS ); } // List of patterns to cycle through. Each is defined as a separate function below. typedef void (* SimplePatternList [])(); SimplePatternList gPatterns = { confetti , off }; uint8_t gCurrentPatternNumber = 0 ; // Index number of which pattern is current uint8_t gHue = 0 ; // rotating "base color" used by many of the patterns void loop () { // Call the current pattern function once, updating the 'leds' array gPatterns [ gCurrentPatternNumber ](); // send the 'leds' array out to the actual LED strip FastLED . show (); // insert a delay to keep the framerate modest FastLED . delay ( 1000 / FRAMES_PER_SECOND ); // do some periodic updates EVERY_N_MILLISECONDS ( 20 ) { gHue ++; } // slowly cycle the "base color" through the rainbow //EVERY_N_SECONDS( 10 ) { nextPattern(); } // change patterns periodically int buttonState ; buttonState = digitalRead ( 3 ); if ( buttonState == HIGH ){ nextPattern (); delay ( 500 ); } } #define ARRAY_SIZE ( A ) ( sizeof ( A ) / sizeof (( A )[ 0 ])) void nextPattern () { { // add one to the current pattern number, and wrap around at the end gCurrentPatternNumber = ( gCurrentPatternNumber + 1 ) % ARRAY_SIZE ( gPatterns ); } } void confetti () { // random colored speckles that blink in and fade smoothly fadeToBlackBy ( leds , NUM_LEDS , 10 ); int pos = random16 ( NUM_LEDS ); leds [ po