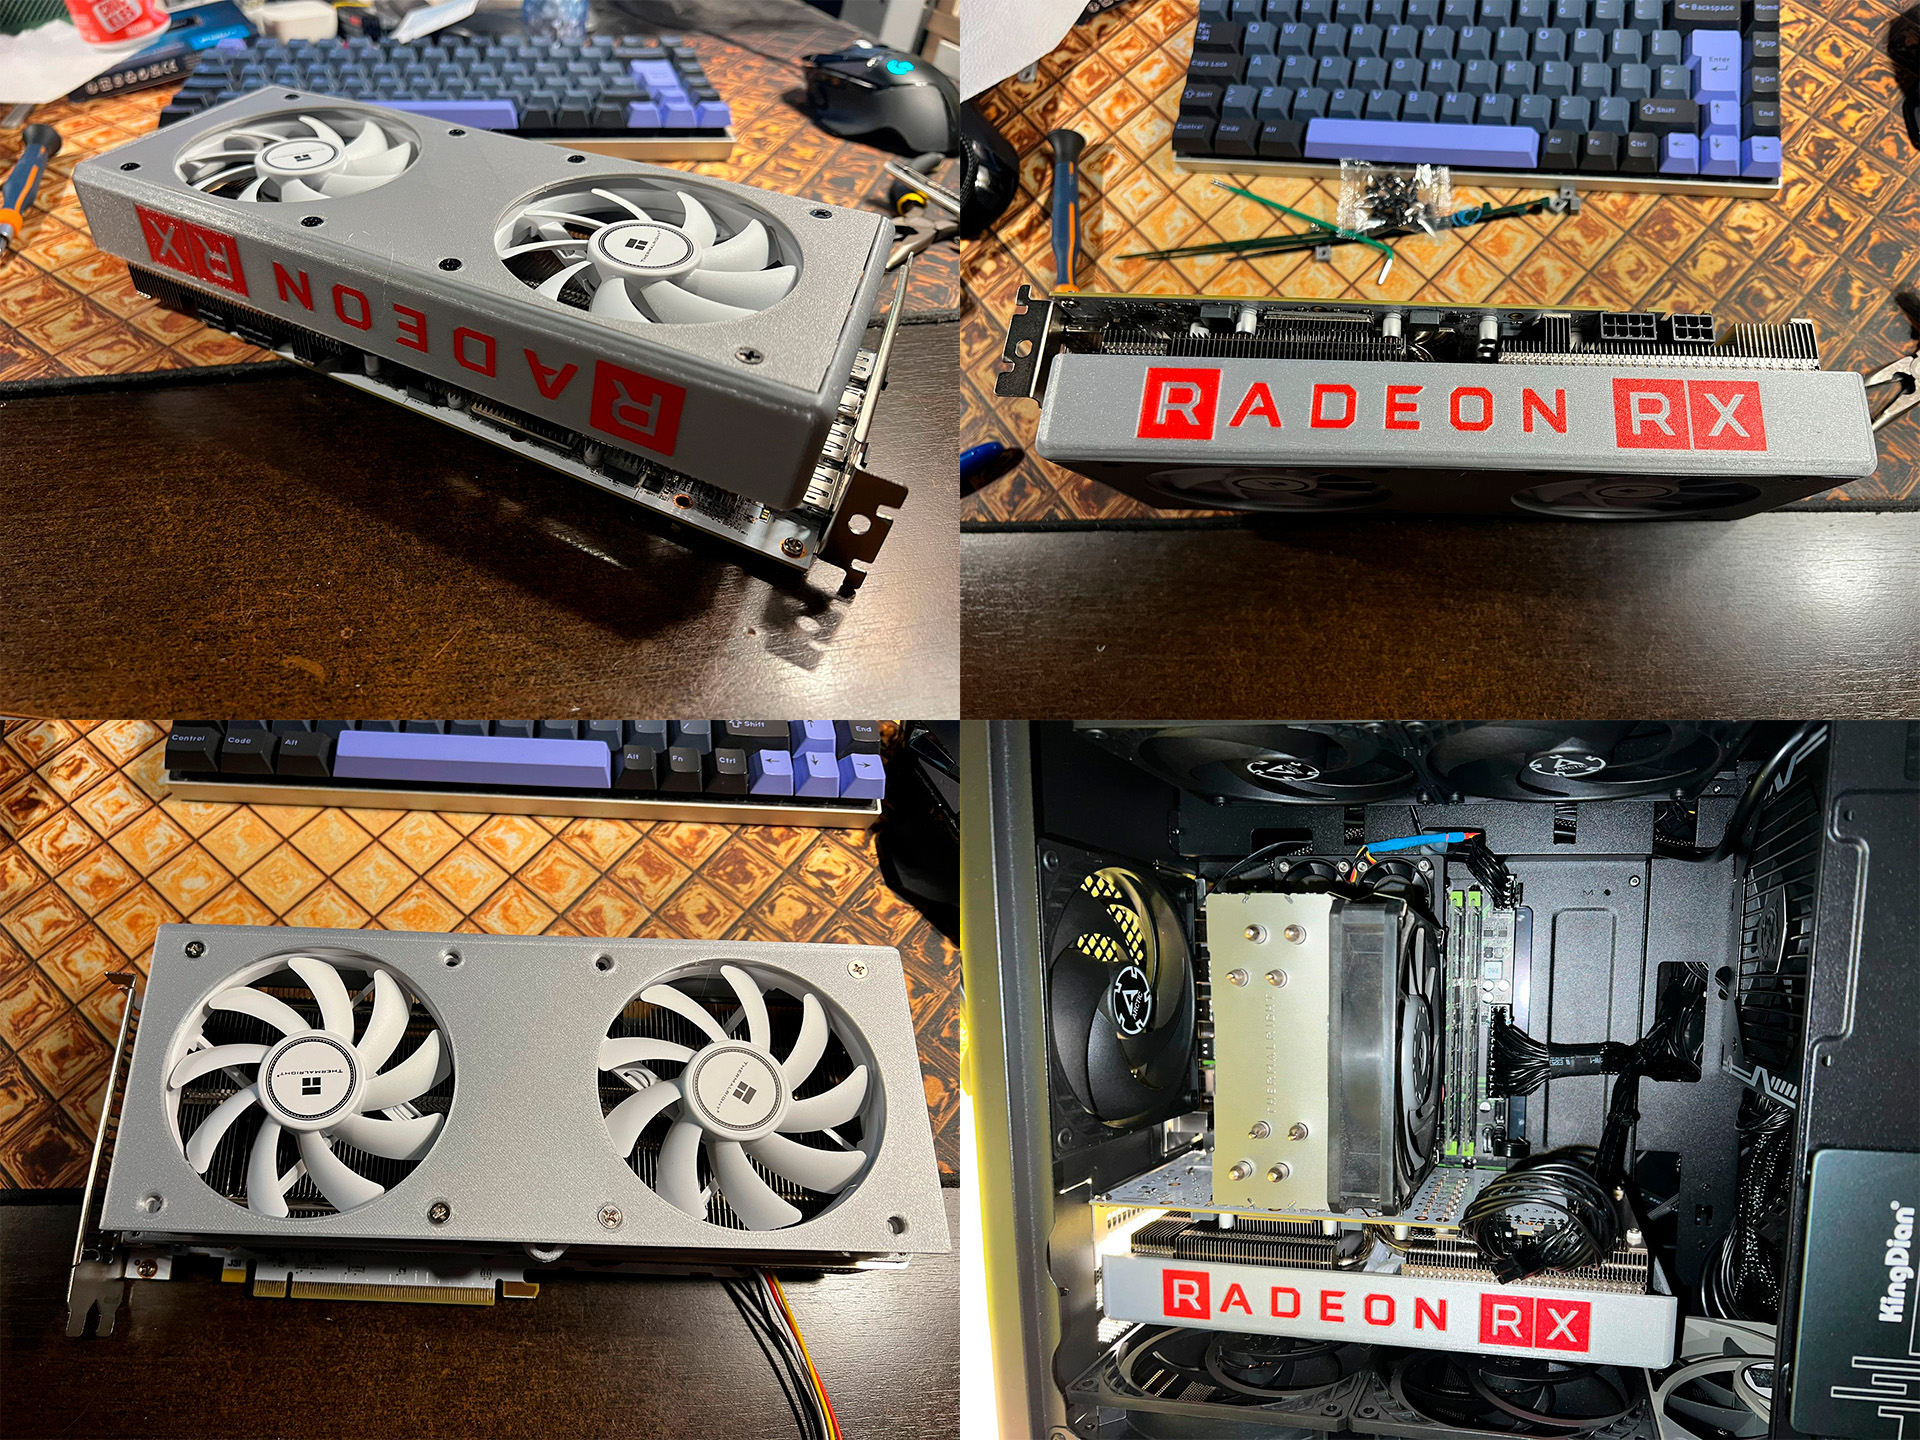
About this 3D model
Before you print This is a WIP project (work in project), almost done in fact, the photos you will see its from all the prototypes I made, some of the problems I found in the assembly are corrected. This project it's compatible with almost all aliexpress cards that have the same type of heatsink (I appreciate some diferences on the fins only of the heatsink that have the power connectors on the side o in the back of the PCB. All parts are printed in PETG and still survived without any bend or problem, but the final print needs to be ABS/ASA at least the fan ducts that are mounted in touch of the heatsink. Please if you notice some errors tell me and I will try to fix. Valid for? Most of RX5700 and RX5700XT from aliexpress, with side or back power connectors. My model are a Soyo RX5700XT. 95% valid for (need someone that print the duct and try…) JieShuo RX5700XT, pic1 , pic2 Meguol RX5700 MLLSE RX5700XT Intro Some weeks ago received an "Soyo" Radeon RX5700XT that bought for a second PC. When start to play and testing the GPU I instantly regret my decision to buy this card.... Oh my f***** god... so many years without hear that type and powerful noise. Try a Ryzen 5800X with wraith stealth cooler (65w one) and crush some cinebenchs... still not enough high pitch fan noise to equal this soyo gpu. It's not fair that I saw to many youtube "reviews" with same card (or clones) with the same cooler and nobody talks about this... only found one fair review... another thing thats it's need to mention... that kind of aliexpress R5700XT comes with 50A rated VRM instead 70A rated VRM of OEM Reference card. If you have a nice one 50A VRM you don't have any problem, even if you overclock the card a push +230W, but if you have crappy vrm take care and not push above 200W. Mine comes with Alpha & Omega AOZ5311NQI BLN3 DrMOS, that are very good, and used in other high end cards like RTX4080/4090. Check yours before push the limit. Why 50A rated VRM can easy take the job of 70A rated? Because you are not capable to cool down with air + thermalpads to much heat. Check this video, https://www.youtube.com/watch?v=-SAWtKEIYbw from gamersnexus, OEM 5700XT can't push more than 250A-300A on air without “suicidal” VRM temps. Efficiency curve of BLN3 and Fairchild FDMF3170 (oem) its very similar, about 1W more of heat per VRM on 35-40A range for BLN3. (Check datasheets if you want) https://aosmd.com/res/data_sheets/AOZ5311NQI.pdf https://www.mouser.com/datasheet/2/308/1/FDMF3170_D-1222701.pdf Also mention that the bios comes with a TDP of 150W, but with powerlimits -+50%, you can go until 225W without flash any bios. The problem The stock Fans makes a lot of high pitch noise, and the stock heatsink is a bit insufficient for this card… this card achieves “good” temperatures at cost of putting 92mm low efficient fans a ridiculous rpm. The stock fans doesn't have much room to push air against all the heatsink. This print tries to maximize the efficiency of this cooler, ducting the air of 92mm fans over all heatsink. And using more friendly acoustic fans. We have a first group of fins of 96x98mm and other second of 103x98, but only can blow air on 85mm wide. The solution and results Put two 92x15mm fans or 92x25mm fans. Some spoliers. 92x15mm (TL-9015 PWM) https://www.thermalright.com/product/tl-9015/ 1000mv/1950mhz Furmark 150W TDP - 69ºC GPU, 82ºC hotspot 150W costant 190W TDP - 78ºC GPU, 97ºC hotspot 177w-182W 92x25mm (TL-B9) https://www.thermalright.com/product/tl-b9/ 1000mv/1950mhz Furmark 150W TDP - 64ºC GPU, 80ºC hotspot - 150W costant 190W TDP - 69ºC GPU, 88ºC hotspot - 176-185W Gaming comparison Stock cooler Gaming comparison 150W round , stock cooler vs modded Gaming comparison 190W round TDP makes reference to the max power the chip can have, 150W means 0% powerlimit, 190W means 30% powerlimit. TLDR: 92x15mm , good for 150W limited tdp, saves space (1 slot vs 92x25mm) 92x25mm, the best temperatures, the quiet (even better the 92x15mm), good for 190W TDP. BOM If you want to run the card naked 8x self tapping M5 fan screws Zip ties (2-2,5mm wide) Fan power adapter If you want to use drill assembly 6x M3x10 screws 6x M3 nuts If you want to put the cover 6x M3 5x4,5 threaded inserts 4x M3x10 screw 2x M3x20 screw 8x (more) self tapping M5 fan screws You can make the fan power adapter with JST PH 2.0 4 pin connectors or canibalizating from other card. Take in consideration that you only need the rpm signal cable only from one FAN, the other runs without. Printing instructions Prototypes printed in PETG survived…. but I do not recommend to run the card for years with PETG duct… try to print at least the fan ducts with ASA/ABS. 3 perimeters 15-20% infill All models can be printed on 25cm bed. Assembly You have two modes of assembly, with drill and no drill. All prototypes run with no drill assembly, just put good zip ties. The heatsink holes are of 2.5mm, you need to drill to 3mm to use M3 screws. You need to remove the cooler to disas