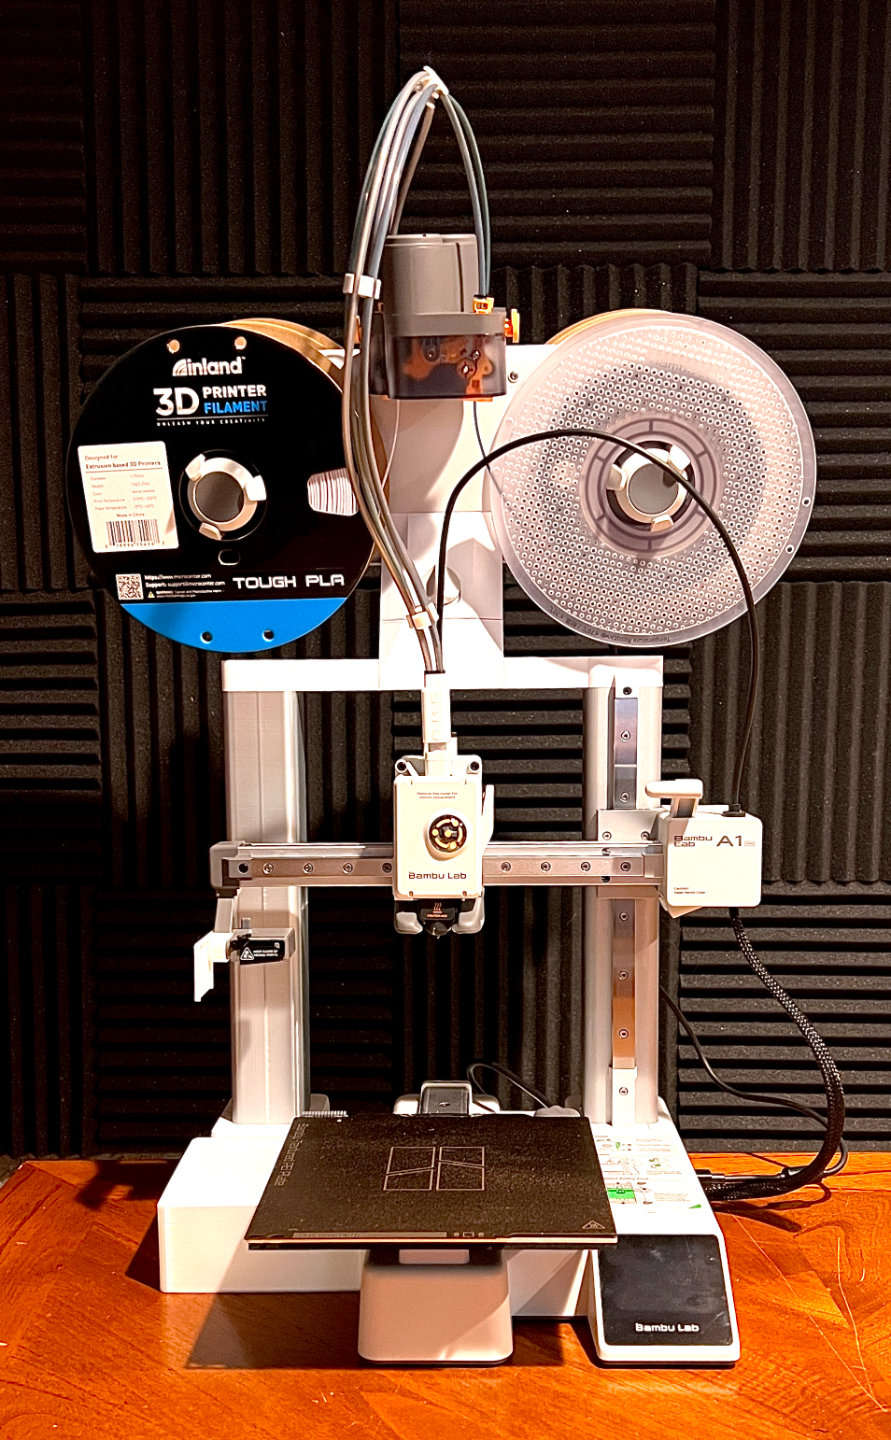
About this 3D model
Note! This design needs no screws! A user copied my instructions verbatim and added screws as a remix. The original was designed without them! Thousands of successful prints and tens-of-thousands of combined print hours show the design does not need that addition . A1 mini AMS lite Overhead Top Mount | v1 A1 mini owners! This is the space-saving overhead top mount for the AMS lite you've waited for! Key details Printable on the A1 mini. No large printers needed! No additional tools or parts required for assembly. But superglue is recommended. Support column matches the mini's original . It's stable and looks like it belongs there! Is easily color customizable. No painting required! It's a small thing, but custom is cool- right? Profiles contain many pre-filled plate options. You have the option to print different combinations of parts, based on your preferences, straight from the existing plates in Bambu Slicer. Why choose this model over others? Besides the fact that it's stable, is based on Bambu's AMS lite mount for the A1, was reinforced to add strength, and can be printed on the A1 mini with ease, I'm a sucker for symmetry. This mod looks like it should've been there all along. My X1-Carbon spoiled me. The A1 made me jealous. Putting the AMS on top? This is the way. And it looks great, too! Instructions Part 1 How to use the provided A1 mini profile: If you only own the A1 mini, make sure you download the A1 mini profile, not the one for the X1-Carbon. The X1-Carbon profile is included for users who have the bigger models and want to print more parts on a plate. The best way to use the included profiles is through Bambu Slicer. It gives you complete control over what you print and with what filament. Plus, you can see all the settings and adjust if you want to tinker. You can choose your own filaments. Right-click on a model part to Change Filament at the bottom of the pop-up menu. DON'T CHOOSE DIFFERENT COLORS FOR MULTIPLE PARTS ON PLATES! Those plates are for single color filament prints ONLY. If you don't follow this advice, you will waste a ton of filament on color changes and print time will be tragically looooooooooong. Profile info: All the things are there! Each plate in the profile is labeled and pre-sliced for a single color. The A1 mini plates 1 and 2 let you print the entire model in 1 color over 2 print jobs. Some of you will want to print the whole thing in one go with a single filament of your choosing. Plates 1 and 2 are your jam. To print the Column Foot separately, plate 3 is an alternative version of Plate 2. You can print the rest of the model in a single color by printing Plate 1 and Plate 3 with one filament, then print Plate 4 (Column Foot) in another color. I like it in white because it matches the mini's base. Plates 4 through 10 let you print parts in whatever color filament you want! Just change the filament used for that part of the model, re-slice, and print. I'm biased, since I made this for my desktop, but the model looks snazzy with a white Column Foot, a silver silk Column, and the color(s) of your choice for the Braces and Mounts. Speed and infill settings optimized for strength. Top and wall speeds are set to 80 mm/s for a nice finish and added adhesion. The speed increases print time, but it's worth it. For all but 2 pieces, Sparse Infill Density is set to 15% and the pattern is Rectilinear. It's a good balance between strength and filament used. The Braces are set to 50% and Adaptive Cubic. This provides a great deal of strength for the horizontal section that supports the AMS lite. Uses Bambu's support settings for ease of removal. The support settings are the same as the original A1 Top Mount profile. Parts are arranged for strength. The orientation of the models on the plates is on purpose. The way the layers are laid down affects the strength of a model against different directions of stress. Superglue (or filament-compatible adhesive of your choice) is recommended! Ideally, for added strength, the Braces and Overhead Mount Bottom should be glued together. Don't glue the Overhead Mount Top nor the Screw and Tab, they need to stay removable! Highly recommended add-ons by other makers: Use cuffs to tame the tubes! To help smooth the path from AMS to print head, use the included Bambu Bowden clip + 2 of your choice. I tried https://makerworld.com/en/models/119723#profileId-128798 and https://makerworld.com/en/models/42464#profileId-43277 Straighten the filament path to the print head. There are a few options out there. One is R3DPanda's Slim A1/A1 Mini PTFE Tube Support. It keeps the PTFE tubes positioned straight to the toolhead and helps reduce wear. You have two options ; the original that works great, or the model I altered to hold the cable (all download credits go to them) https://makerworld.com/en/u/3657474713. [April 2, 2024] Note : A user reported the model I altered prevented their tangle sensor from activating (https://wiki.bambulab.com/en/ams-lite/manua