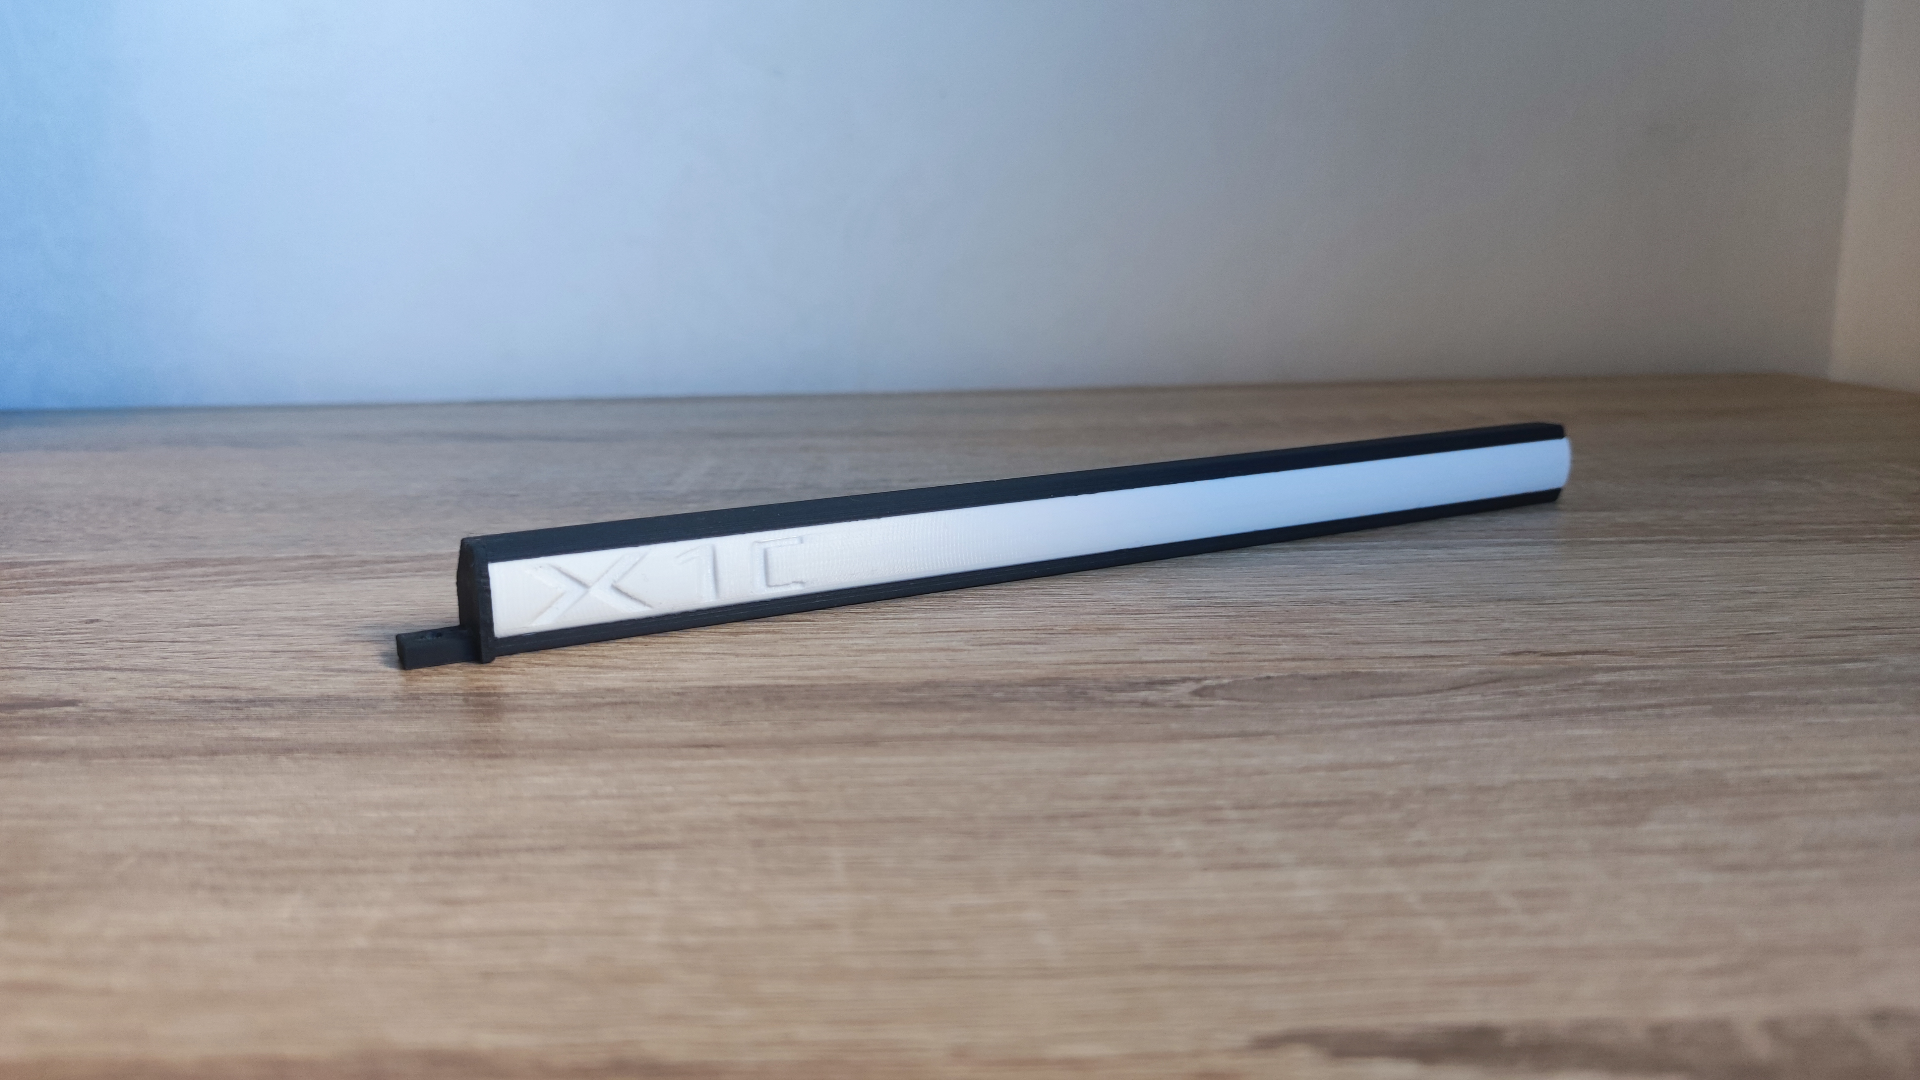
About this 3D model
I design this chamber LED bar, it reflects the original design , but it's longer 6cm than the original and it, so you will have more lights inside the chamber without needing to print a riser. To light up the LED bar you can user jumpers to connect it to the original 2 pins connector OR buy the same 2 pins connector than connect it to the board ( I RECOMMEND THIS CHOICE ) OR solder the cables of the new LED bar to a USB port and connect to a power bank , as example. There are 6 different lenses: P1P , P1S , X1 , X1C , 1 BLANK and 1 with the Bambu Lab logo. When you open the .3MF file of the lenses , you see 6 beds and 6 lenses, you must choose the one you want to print for your printer. You can't never go wrong , it's simple. The total length is 240mm, it cannot be longer otherwise it would touch the STEPPER MOTOR and could melt! I recommend PETG white for the LENS for its properties or white ASA , white ABS , white PC IF YOU FEEL “”""safer""""" , if you do , you need to handle problems like warping or bad bed adhesion….So PETG make this print easier. ---------------------------- I already did a test running my X1C a 110°c bed and 300°c for 2 hours , the chamber has a stable temperature of 43°c. So please don't write useless comment like “ lens will melt” or “PETG lens isn't good” , ‘cause many people don’t know filaments properties and they always use to criticize work of other designers or makers , when they only have the habit to download files! ----------------------------- For the case PETG, PETG-CF, ABS , PC , ASA , PA6-CF , PET-CF or PAHT-CF. Inside the case you can install 2 LED strips of 9mm width, one LED strip on the bottom and one on the hypotenuse, on the diagonal with a 45° angle. NOTICE: BEFORE INSTALLING THE CHAMBER BAR YOU NEED TO INSERT THE LED BAR STRIP, REMEMBER MAXIMUM WIDTH 9MM! NOTICE: THE PRINTER MUST BE TURNED OFF! I have the Bambu Lab X1C and the 2 pins connector is placed behind the touchscreen, above the cam and attached to this board as you see in this pic. IT'S GLUED FROM THE FACTORY, so work slow and be patient to when you remove the glue USING TWEEZERS. DO NOT TOUCH OTHER PARTS OF THE BOARD , BE CAREFUL AND YOU DON'T CAUSE DAMAGE! NOTICE: I take NO responsibility for modifying the chamber LED bar and connections or for choosing how to turn it on. If you are not skilled at making this mod, either don't do it or get help! What tools do you need? Pliers, screwdriver, M3 and M2 hex. What screws do you need? You also need an 10mm M3 hex screw, M3 nut and a 10mm/12mm screw with a larger thread. HOW DO YOU INSTALL THE CHAMBER LED BAR? FOLLOW THIS STEPS: TURN ON THE PRINTER BRING THE BED TO THE BOTTOM , SO YOU HAVE MORE SPACE ; REMOVE THE PLATE , SO YOU DON'T SCRATCH IT ; TURN OFF THE PRINTER , TURN OFF THE PRINTER , TURN OFF THE PRINTER! REMOVE THIS SCREW WITH A M2 HEX REMOVE THE CAM , GO ON THE BAMBU LAB PAGE AND FOLLOW THE INSTRUCTIONS; LAY THE NEW LED BAR CASE ON THE FRAME AND TIGHTEN THIS SCREW WITH THE LARGE THREAD AS YOU SEE IN THIS PIC (DO NOT OVERTIGHTEN) INSERT AND TIGHTEN THE NUT (IN THAT HOLE) AND THE M2 SCREW AS YOU SEE IN THIS PIC SLIDE THE LENS TIGHTEN THE SCREW WITH THE LARGER THREAD MOUNT THE CAM , FOLLOW BAMBU LAB INSTRUCTIONS CONNECT THE LED BAR TO THE BOARD OR TO AN EXTERNAL ENERGY SOURCE, SUCH AS A POWER BANK CLOSE THE COVER OF THAT PCB ( BOARD WHERE THE 2 PINS CHAMBER LED BAR IS CONNECTED), SEE THIS PIC YOU ARE DONE! If you follow this steps , you will successfully install the chamber LED bar without doing damage to the printer. I have the chamber LED bar already mounted and tested , I don't have any issues! I also took measurements with a digital caliper and the chamber LED bar is not bumped by the toolhead or other mechanical parts. So DO NOT change the dimensions, print it as it is in the file, I take no responsibility for this MOD! I have already tested it and as I already said, I have no problems. By the way , if you need help , I will be happy and glad to give you to install the chamber LED bar. LAST THING FOR MAKERS WHO COPY: BREAKING THE COPYRIGHT RULES CAN BE DEEMED A CRIMINAL OFFENSE. Give me please a like and subscribe to my page to always be informed about my new 3D models and new designs. I appreciate if you will give me a donation, so I can bring my ideas forward: https://bmc.link/engineeringprojetcs . Thank you to support me and happy printing.